Groupes et permissions granulaires dans les salles de données
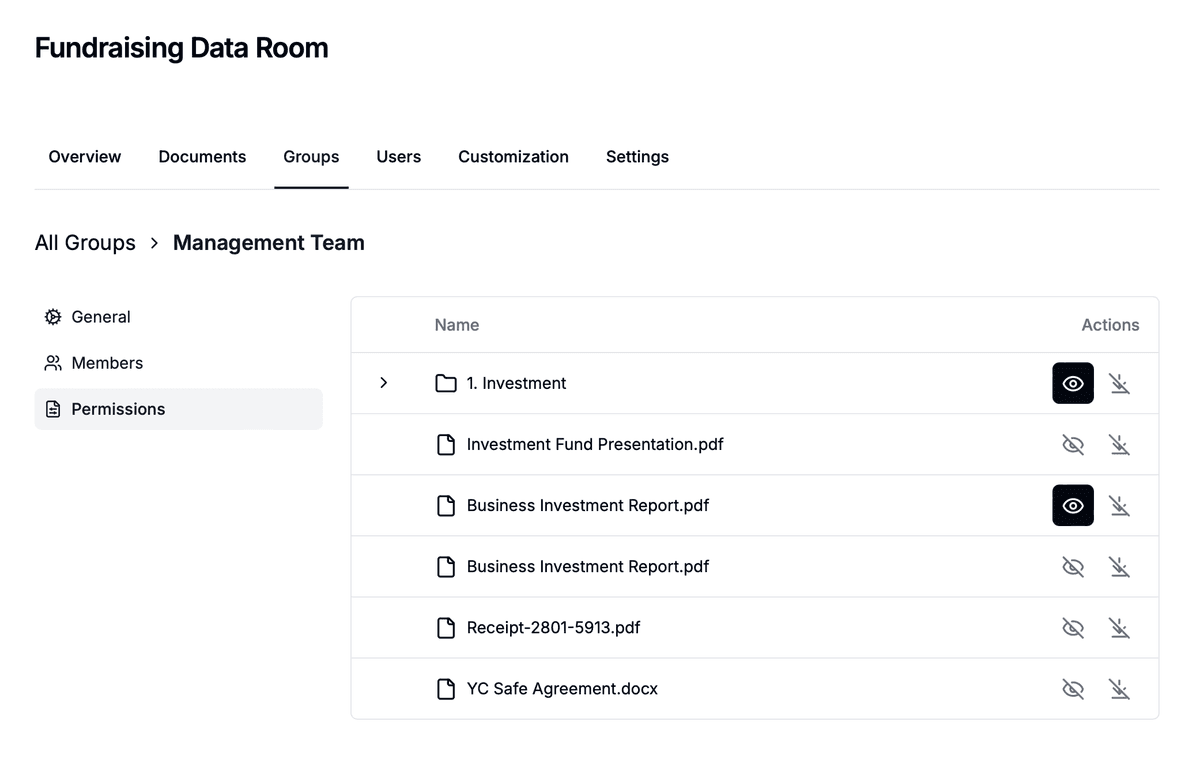
Les groupes dans Papermark offrent un moyen puissant de gérer l'accès aux documents de votre salle de données. En créant des groupes et en définissant des permissions granulaires, vous pouvez contrôler exactement qui voit quoi et quelles actions ils peuvent effectuer. Ce guide vous expliquera comment gérer les groupes et configurer leurs permissions.
Comprendre les groupes et les permissions
Les groupes sont le fondement du contrôle d'accès dans les salles de données Papermark. Chaque groupe peut avoir :
- Plusieurs membres avec des droits d'accès partagés
- Des permissions spécifiques pour différents documents et dossiers
- Des niveaux d'accès personnalisés pour la visualisation et le téléchargement de contenu
- Des restrictions basées sur le domaine pour une sécurité renforcée
Création et gestion des groupes
- Accédez à votre salle de données
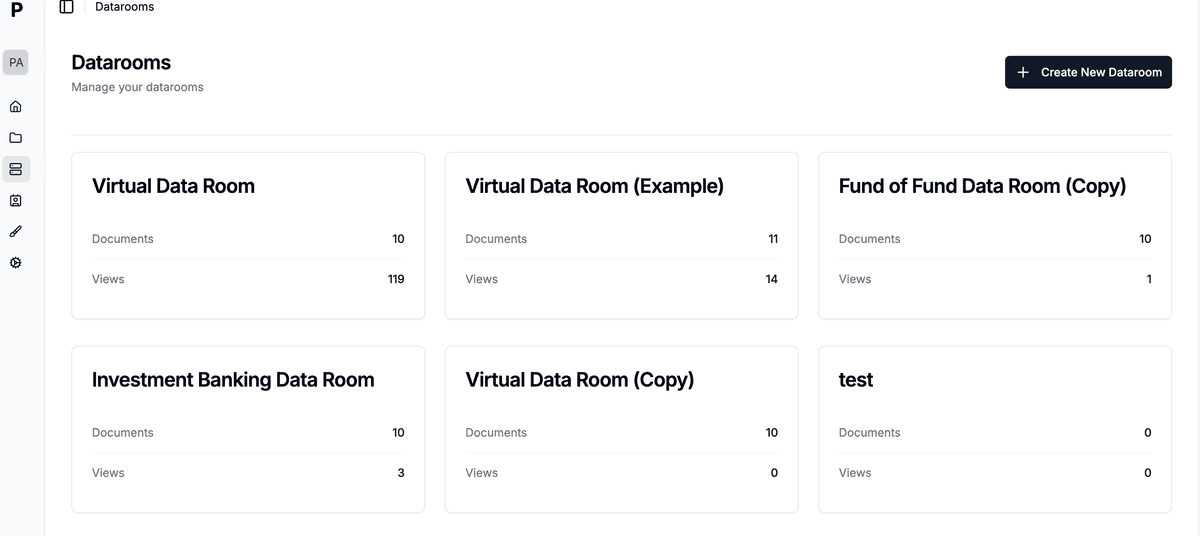
- Cliquez sur le menu « Permissions » à côté du nom de la salle de données

- Dans l'interface à onglets, passez à « Groupes » (depuis « Liens »)

- Pour créer un nouveau groupe :
- Cliquez sur le bouton « Créer un groupe » à droite
- Saisissez un nom pour votre groupe (minimum 3 caractères)
- Cliquez sur « Ajouter un nouveau groupe »
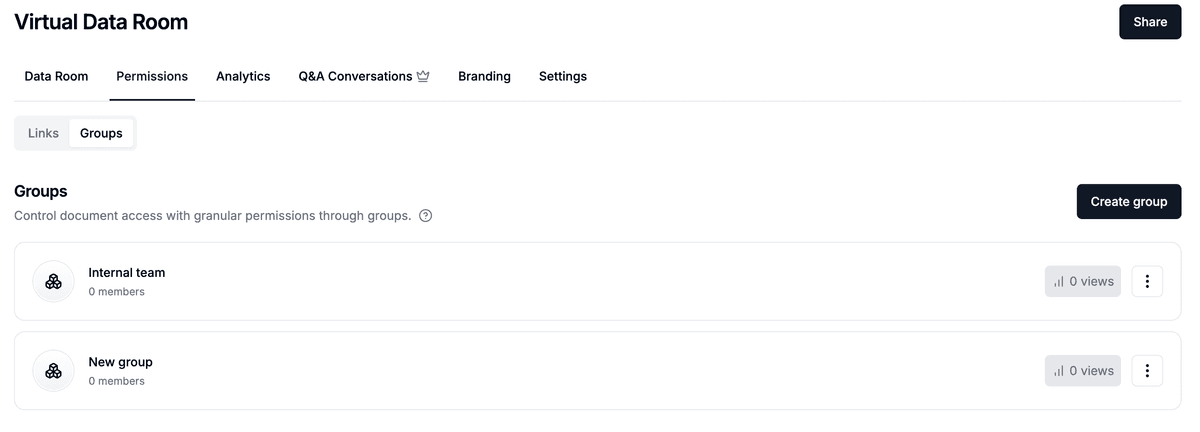
- Pour gérer un groupe existant, cliquez dessus dans la liste des groupes
Configuration des permissions de groupe
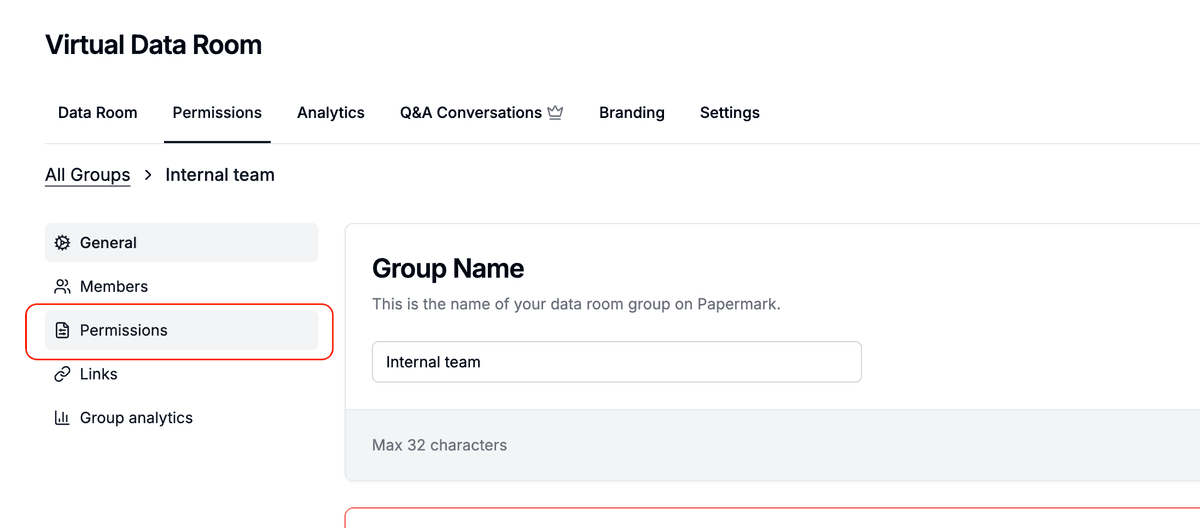
- Sélectionnez un groupe dans votre liste de groupes
- Accédez à l'onglet « Permissions »
- Vous verrez une vue hiérarchique des dossiers et fichiers de votre salle de données
- Pour chaque dossier ou fichier, vous pouvez définir :
- Permission de visualisation : Contrôle qui peut voir le contenu
- Permission de téléchargement : Contrôle qui peut télécharger le contenu

Option de partage rapide
Lors de la configuration des autorisations, vous avez deux options :
- Partager l'ensemble de la data room : utilisez ce bouton pour accorder rapidement l'accès à tout le contenu
- Autorisations personnalisées : configurez des droits d'accès spécifiques pour des dossiers et fichiers individuels

Hiérarchie des autorisations
Les autorisations dans Papermark suivent une structure hiérarchique :
Autorisations au niveau du dossier
- S'appliquent à tout le contenu du dossier
- Se propagent automatiquement aux sous-dossiers et fichiers
- Permettent une gestion efficace de plusieurs documents
- Peuvent être remplacées au niveau du fichier
Autorisations au niveau du fichier
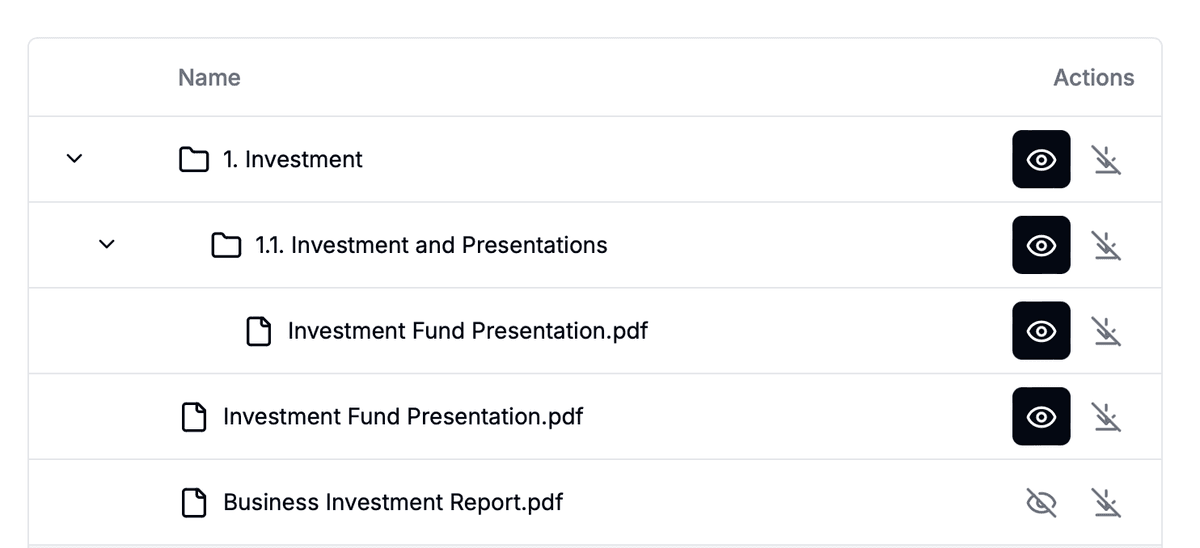
- Définissez des autorisations spécifiques pour des fichiers individuels
- Remplacez les autorisations au niveau du dossier si nécessaire
- Contrôlez séparément les droits de visualisation et de téléchargement
Partage d'accès
Pour partager l'accès avec les membres du groupe :
- Créez un lien de partage :
- Cliquez sur le bouton "Partager" dans votre data room
- Sélectionnez "Créer un lien de groupe"
- Choisissez le groupe avec lequel vous souhaitez partager
- Configurez les paramètres du lien :
- Définissez une date d'expiration (facultatif)
- Ajoutez des restrictions d'accès
- Partagez le lien généré avec les membres du groupe
Les destinataires qui accèdent à la data room via un lien de groupe hériteront automatiquement des autorisations de ce groupe.
Bonnes pratiques pour la gestion des groupes
- Regroupement logique : créez des groupes basés sur les rôles ou les besoins d'accès
- Autorisations minimales : accordez uniquement les niveaux d'accès nécessaires
- Révision régulière : auditez périodiquement les appartenances aux groupes et les autorisations
- Utilisez des dossiers : structurez votre data room avec des dossiers pour simplifier la gestion des autorisations
- Testez l'accès : vérifiez que les autorisations fonctionnent comme prévu avant de partager avec les utilisateurs
Fonctionnalités avancées
- Autorisations en masse : mettez à jour plusieurs éléments simultanément en utilisant les autorisations de dossier
- Journaux d'accès : suivez l'activité du groupe et l'accès aux documents
- Héritage des autorisations : comprenez comment les autorisations se propagent des dossiers aux fichiers
Conclusion
Les groupes et les permissions granulaires dans Papermark offrent une méthode flexible et sécurisée pour gérer l'accès aux documents. En structurant soigneusement vos groupes et permissions, vous pouvez garantir que les informations sensibles ne sont accessibles qu'aux bonnes personnes tout en maintenant une collaboration efficace.