Feeling constrained by Digify's limited data rooms (3 in Pro, 10 in Team) and storage caps (100GB/500GB)? This guide will walk you through migrating to Papermark, where you'll get unlimited data rooms and storage, plus flexible team seats for seamless collaboration.
Data room exports require owner/co-owner permissions
Export process can take up to 10 minutes
PDF downloads include watermarks by default
Original file formats are only available with specific permissions
All sharing settings need to be reconfigured after migration
Step 1: Export your Digify content
For complete data room export:
Enter your data room
Click "Settings" in the top-right corner
Navigate to "Export" in the left sidebar
Click "Export Data Room"
Wait for email with download link (up to 10 minutes)
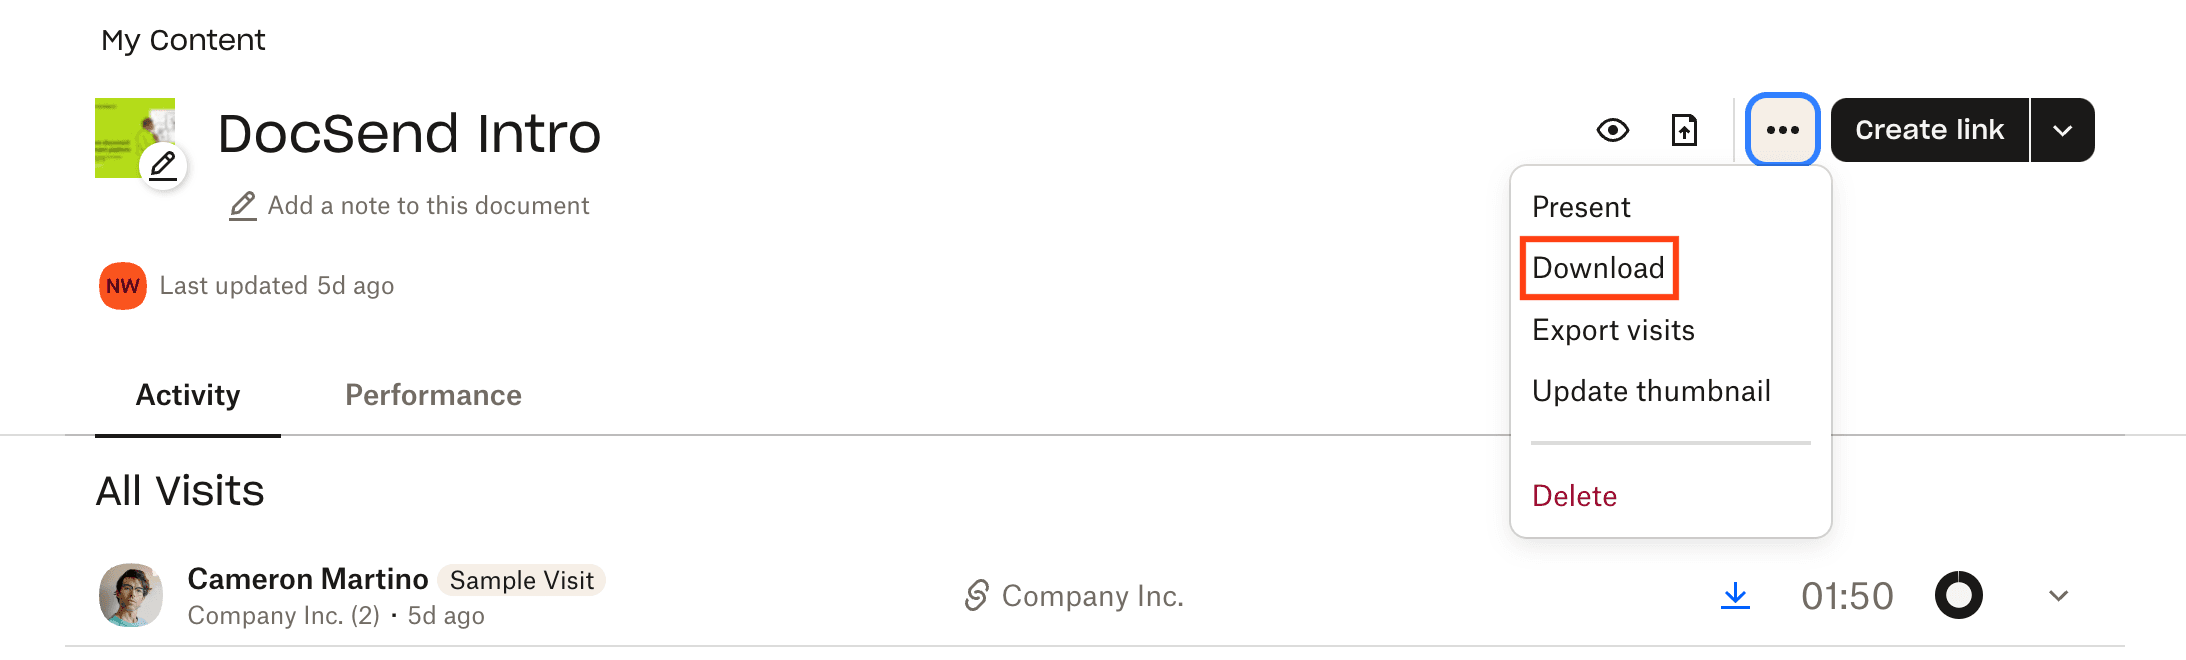
For individual files:
Go to the "Files" section
Click three dots (...) beside the file
Select "Download"
For multiple files:
Select checkboxes for desired files
Click "Download" in the floating menu
Files will be downloaded as a .zip file
Important notes:
Only data room owners/co-owners can export all files
Contributors need specific download permissions
PDF downloads include watermarks if enabled
Original format downloads bypass watermarks
Step 2: Prepare your files for Papermark
Before uploading to Papermark, organize your files. Papermark supports:
PDF documents (.pdf)
Microsoft Office files (.doc, .docx, .xls, .xlsx, .ppt, .pptx)
Spreadsheets (.csv, .ods)
Images (.png, .jpg, .jpeg)
Videos (.mp4, .mov, .avi, .webm)
CAD files (.dwg, .dxf)
Compressed files (.zip)
And more
We saved 70% by transitioning to Papermark. And managed to scale our sales. Our team loves this modern data rooms.
Alonso Benavides Panizo
SVP of Finance at Yuno | Founding team
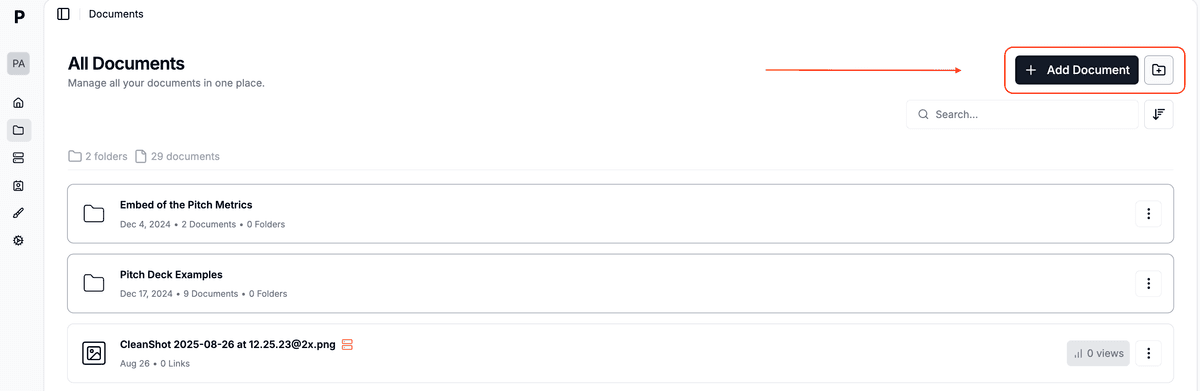
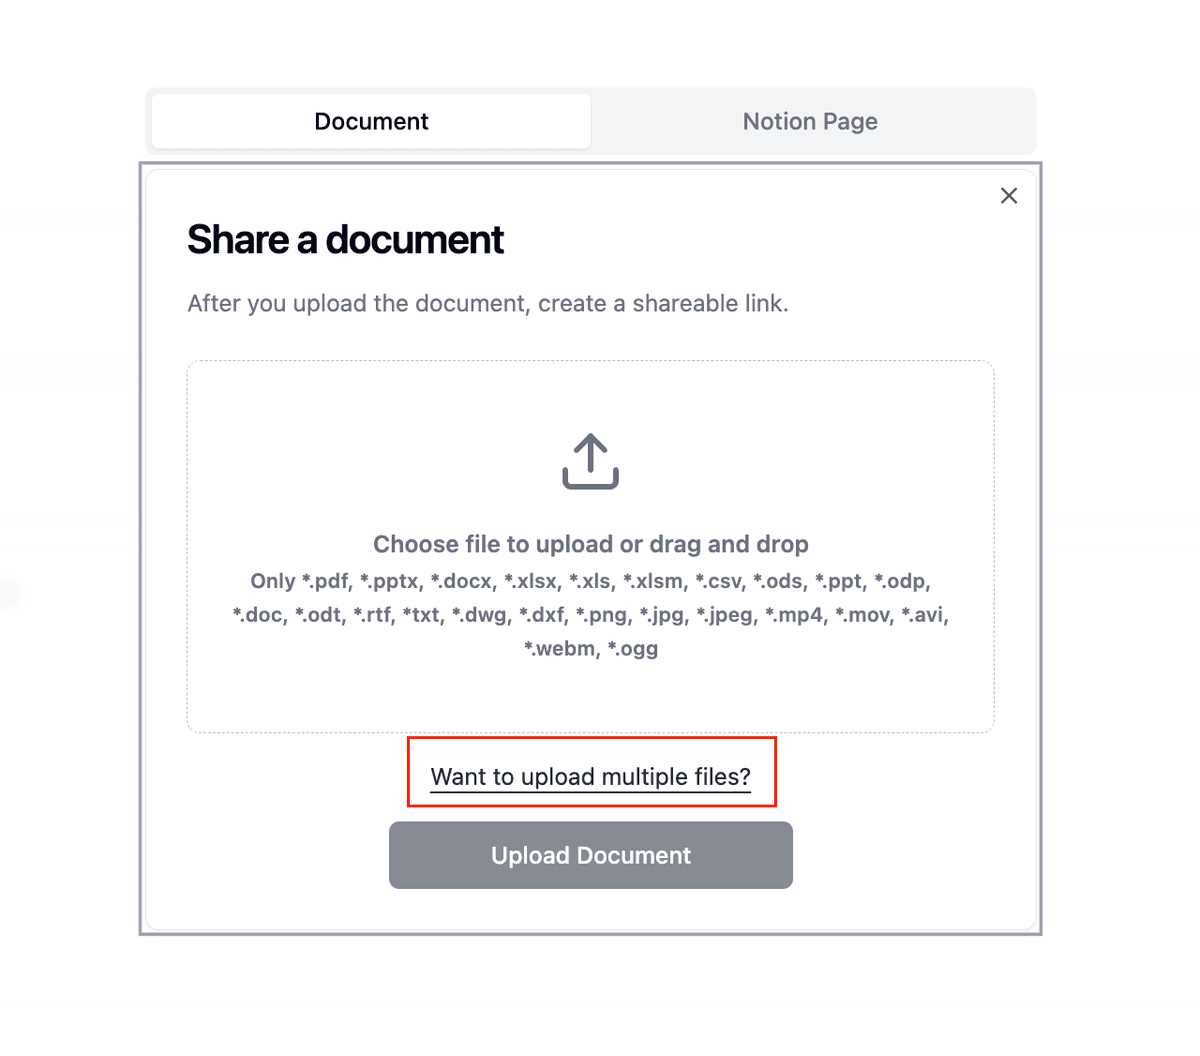
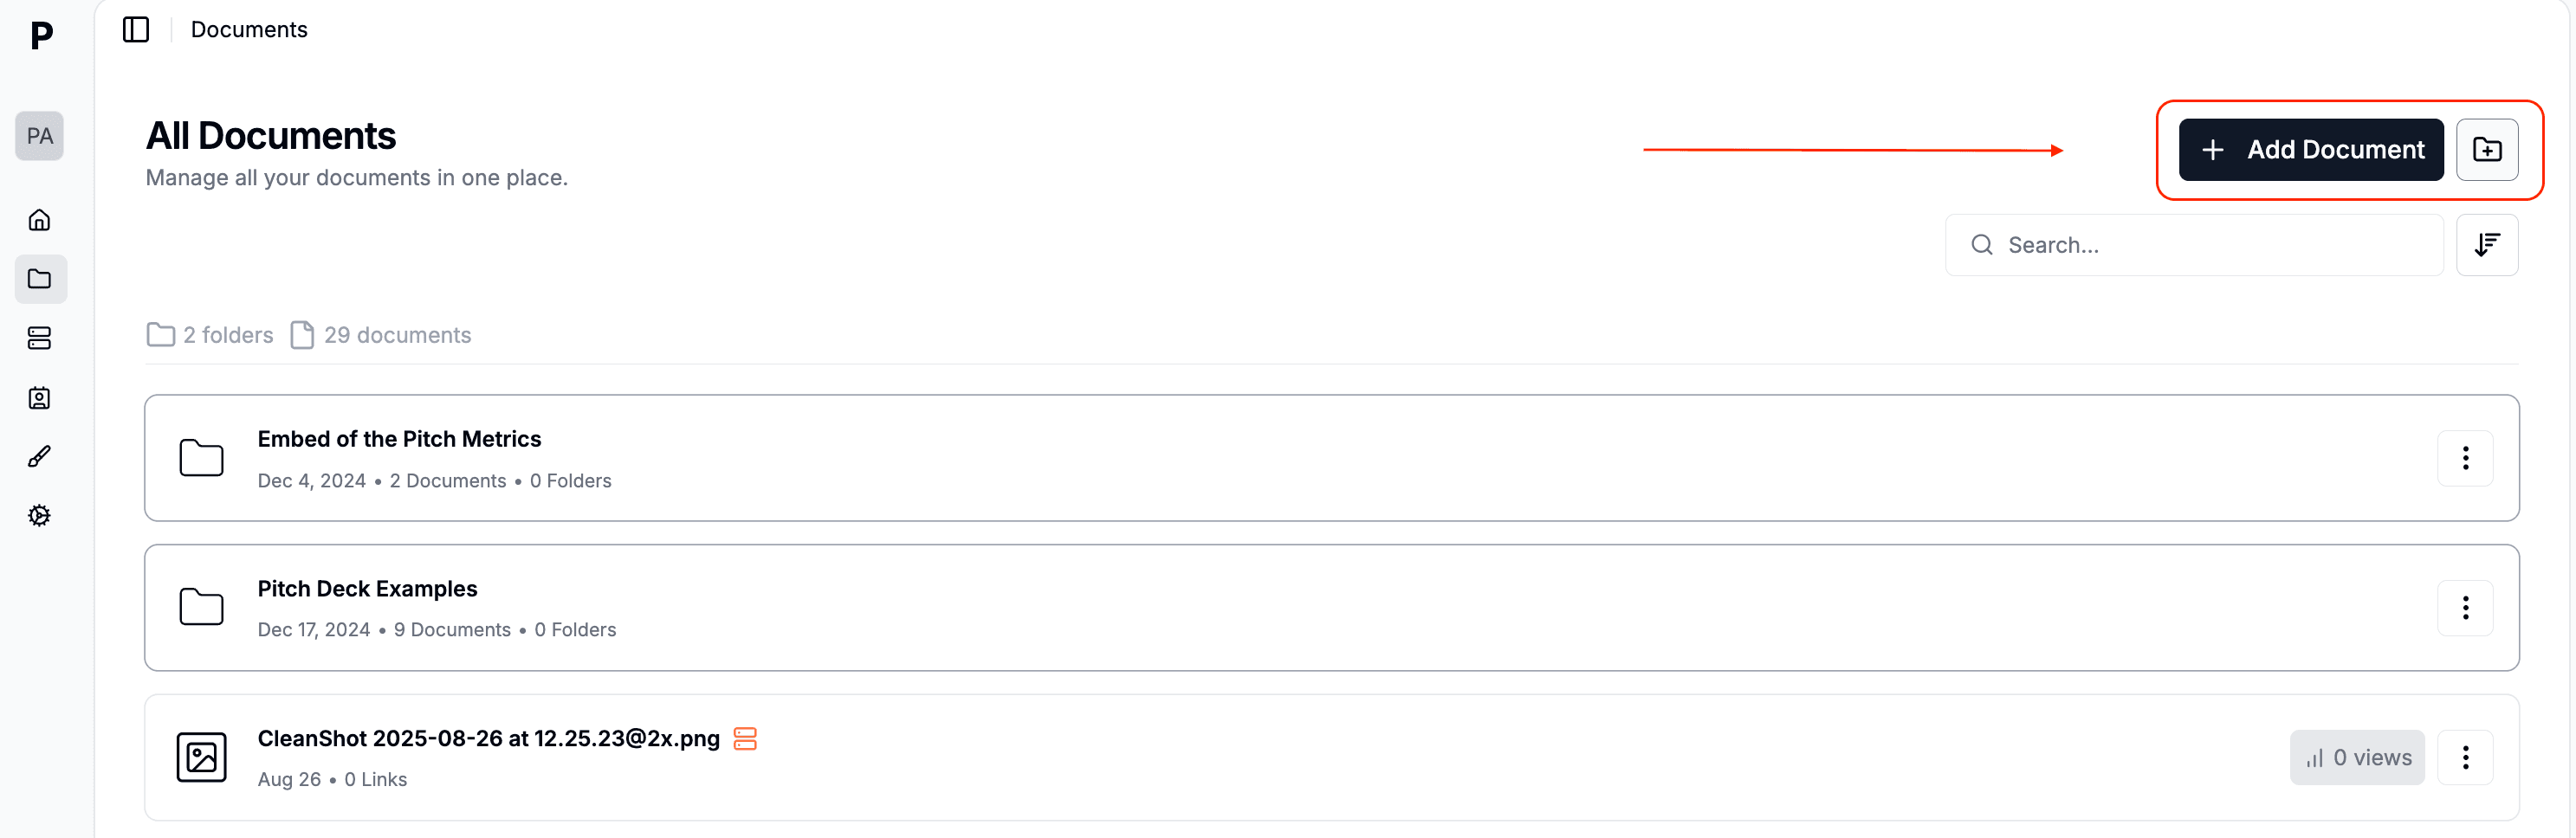
Step 3: Upload to Papermark
Log in to your Papermark account
Navigate to "Documents" in the sidebar
Click "Add Document" in the top right corner
You can then:
Upload individual files by clicking or dragging
Create folders to organize your documents
Upload multiple files simultaneously
Maintain folder structure when dragging folders
The Documents page shows you all your files in one place, with details like:
Number of folders and documents
Creation dates
View counts
Quick access to sharing options
Step 4: Set up secure sharing
Configure document settings:
Set up viewing permissions
Enable watermarking if needed
Configure access controls
Set expiration dates
Create data rooms (if needed):
Click "New Data Room"
Organize documents into folders
Set granular permissions
Enable NDA requirements
Digify vs Papermark comparison
Feature
Digify
Papermark
File downloads
PDF-only for most users
Original formats preserved
Export process
Up to 10 minutes wait
Instant downloads
Document analytics
Basic activity log
Comprehensive analytics on all plans
Security features
Fixed watermarking
Dynamic watermarking, NDA, granular permissions
Viewer tracking
Basic activity tracking
Detailed viewer analytics and engagement tracking
Data rooms
Complex permission system
Intuitive access controls
Access control
Role-based permissions
Flexible permission system with custom roles
Self-hosting option
Not available
Available (open-source)
White labeling
Limited branding options
Complete white-label solution
Document engagement
Basic tracking
Real-time engagement analytics
Use cases for migration
Investment firms: Share pitch decks with better tracking and analytics
Sales teams: Distribute materials without format restrictions
Legal teams: Maintain document security with flexible watermarking
Marketing teams: Track engagement across original file formats
Consultants: Share deliverables with professional presentation
FAQ
Conclusion
Transitioning from Digify to Papermark streamlines your document sharing workflow while maintaining professional-grade security. While Digify focuses on restrictive sharing and format conversion, Papermark provides a more flexible approach with enhanced analytics and engagement tracking. The migration process is straightforward, and the benefits of improved usability and comprehensive document insights make it a valuable upgrade for businesses.