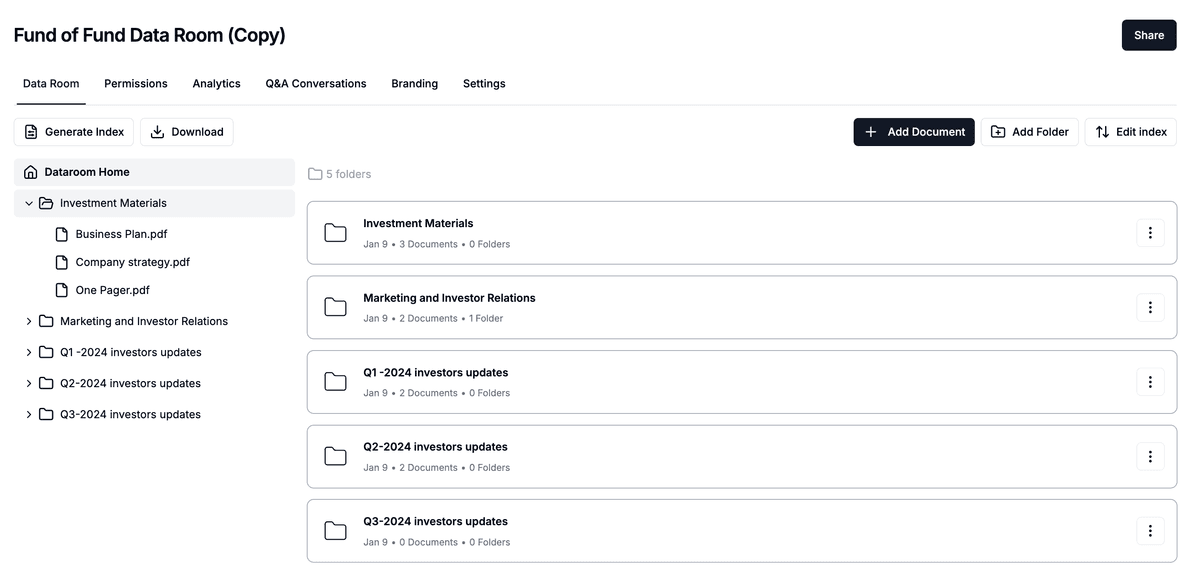
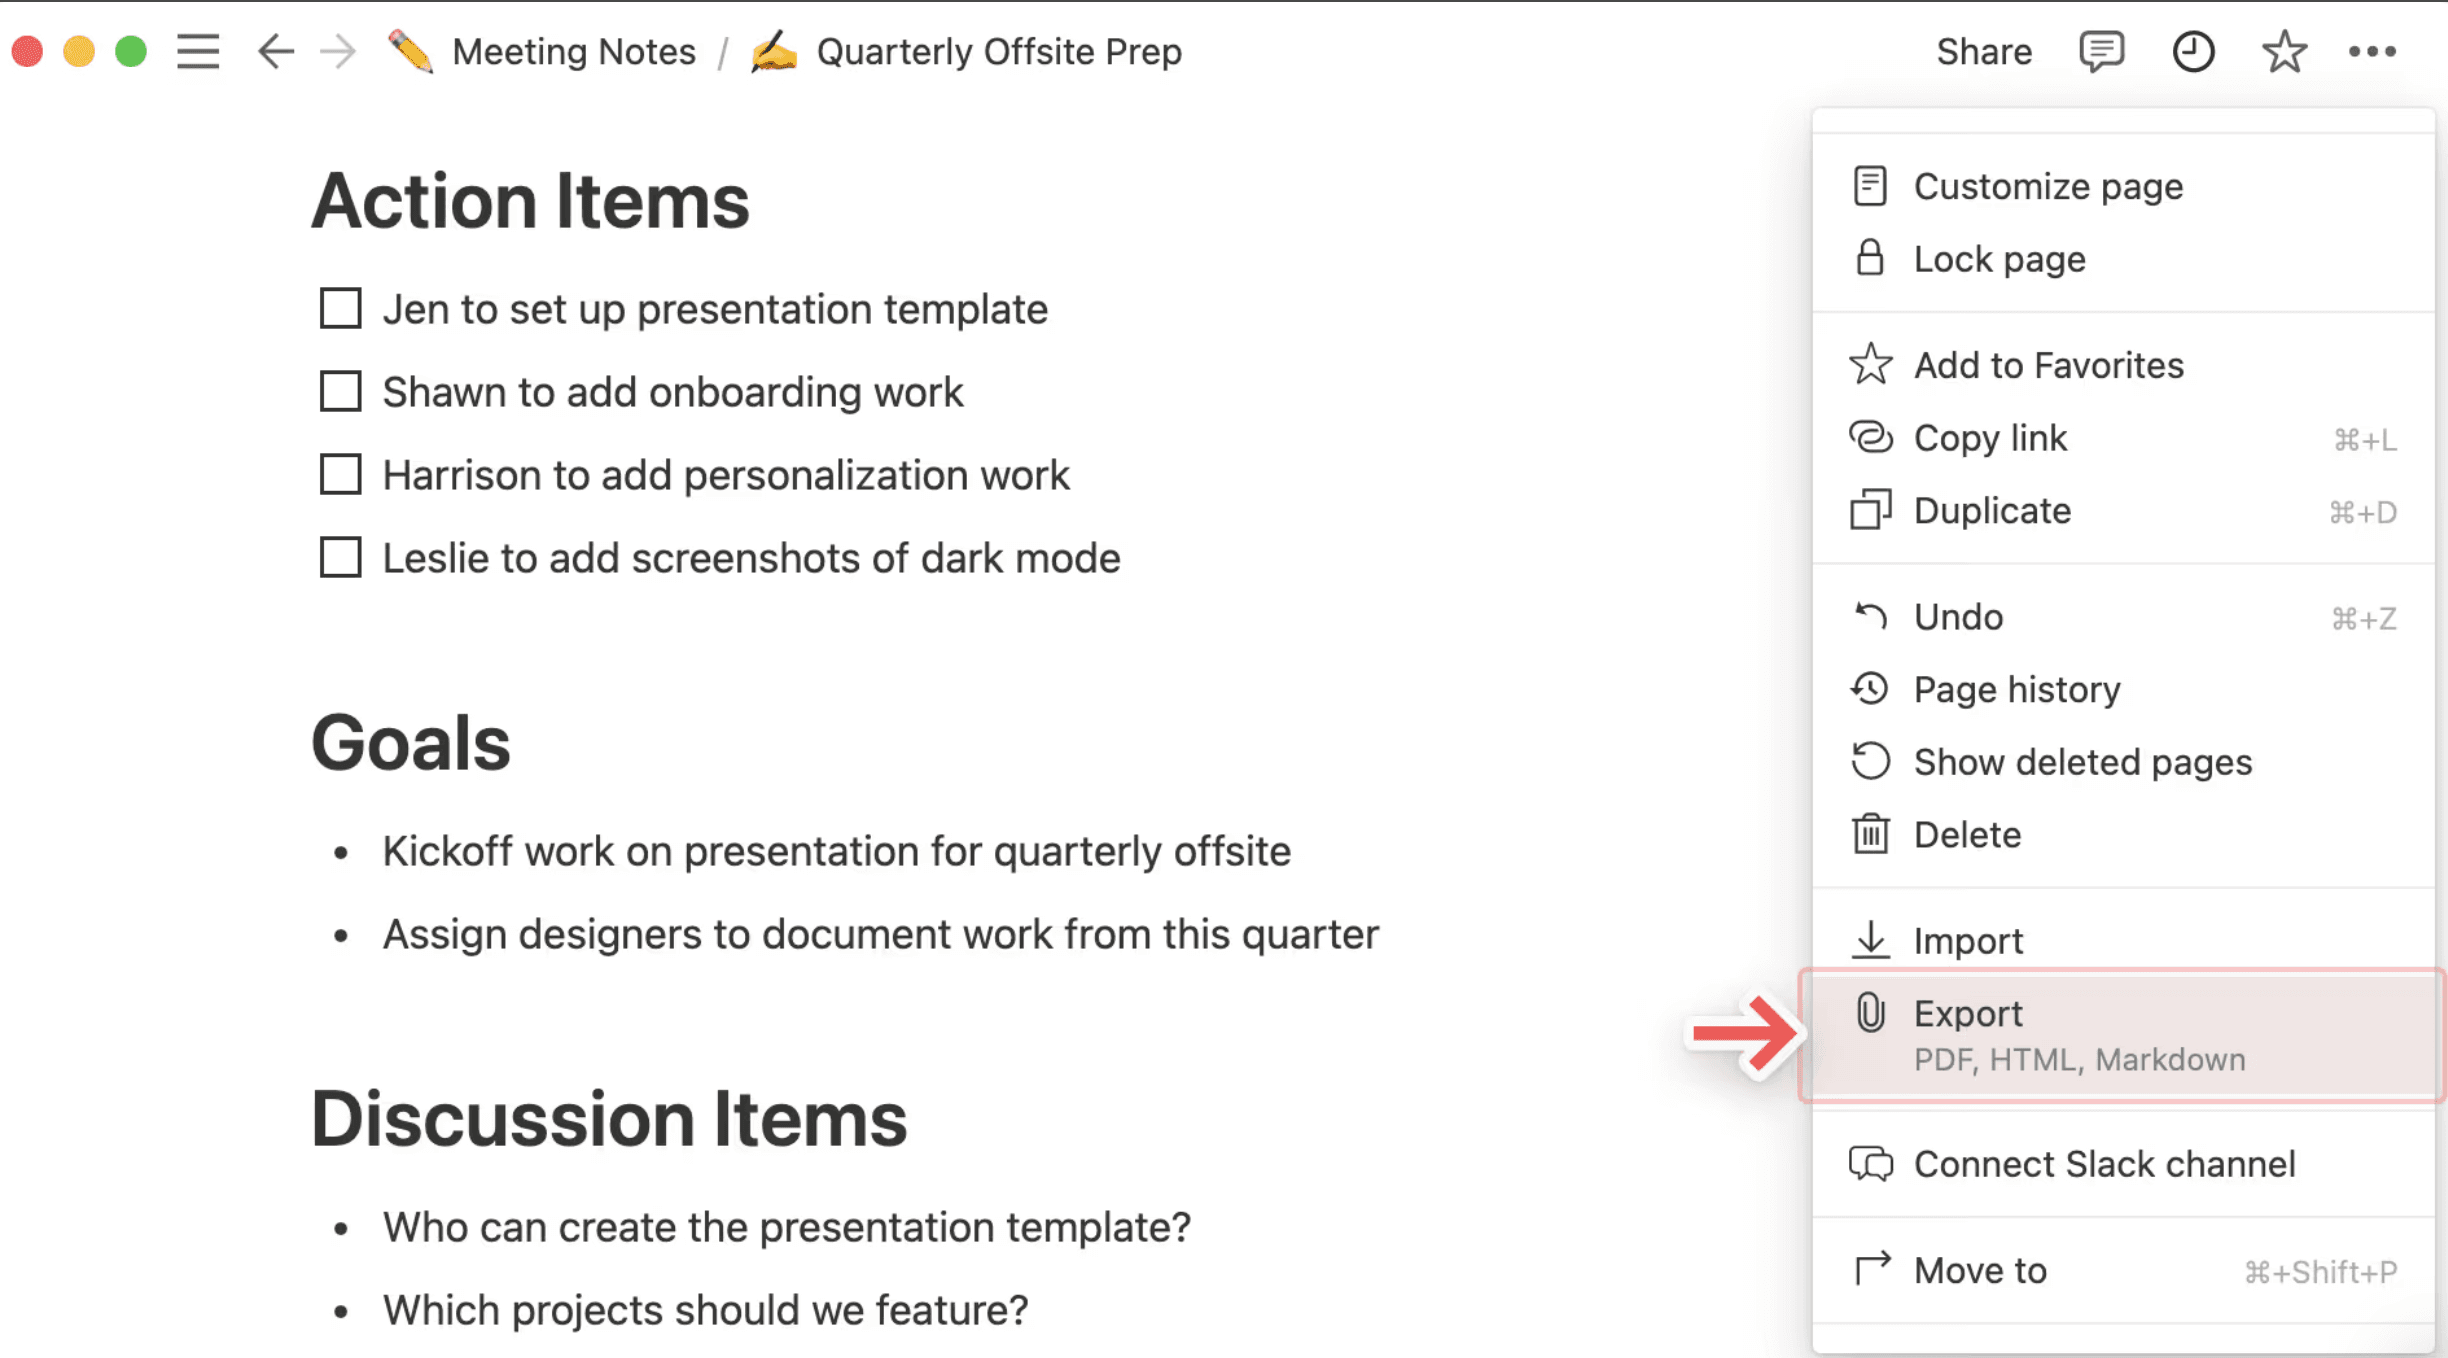
BlogHow to Transition from Google Drive to Papermark

How to Transition from Google Drive to Papermark

Making the switch from Google Drive to Papermark can enhance your document sharing experience with professional features like engagement analytics and dynamic watermarking. This guide will walk you through the migration process step by step.

What you need to know about migrating from Google Drive

  • Files can be downloaded individually or in bulk
  • Some formats may need conversion before download
  • Browser settings can affect downloads
  • Third-party cookies may need to be enabled
  • Papermark provides enhanced security and analytics

Step 1: Export your Google Drive content

  1. For individual files:

    • Go to drive.google.com
    • Click the file you want to download
    • Right-click and select "Download"
  2. For multiple files:

    • Press Command (Mac) or Ctrl (Windows)
    • Click additional files to select them
    • Right-click and select "Download"

Important notes:

  • You can't drag files directly to your desktop
  • Watch for warning messages on suspicious files
  • Some files may need format conversion before download
  • Files might be blocked if you only have view/comment access

If you have trouble downloading:

  • Enable third-party cookies for drive.google.com
  • Check Chrome settings at chrome://settings/cookies
  • Disable extensions temporarily if needed
  • Ensure you have proper file access permissions

Google Drive Interface

Step 2: Prepare your files for Papermark

Before uploading to Papermark, organize your files. Papermark supports:

  • PDF documents (.pdf)
  • Microsoft Office files (.doc, .docx, .xls, .xlsx, .ppt, .pptx)
  • Spreadsheets (.csv, .ods)
  • Images (.png, .jpg, .jpeg)
  • Videos (.mp4, .mov, .avi, .webm)
  • CAD files (.dwg, .dxf)
  • Compressed files (.zip)
  • And more

Step 3: Upload to Papermark

  1. Log in to your Papermark account
  2. Navigate to "Documents" in the sidebar
  3. Click "Add Document" in the top right corner

Papermark Documents Interface

  1. You can then:
    • Upload individual files by clicking or dragging
    • Create folders to organize your documents
    • Upload multiple files simultaneously
    • Maintain folder structure when dragging folders

Papermark Upload Interface

Step 4: Set up your data rooms

  1. Create a new data room:
    • Click "New Data Room"
    • Name your data room
    • Add a description (optional)

Papermark Data Room Interface

  1. Organize your documents:
    • Create folders to match your Drive structure
    • Upload documents to specific folders
    • Set viewing permissions

Papermark Data Room Organization

Google Drive vs Papermark comparison

FeatureGoogle DrivePapermark
Document sharingBasic link sharingProfessional sharing with analytics
AnalyticsBasic view historyDetailed page-by-page engagement tracking
SecurityBasic access controlsDynamic watermarking and NDA support
Data roomsFolder-based sharing onlyPurpose-built data rooms with analytics
File conversionRequired for some formatsNative support for business formats
Professional featuresConsumer-focusedBuilt for business and investment teams
Browser requirementsSpecific cookie settings neededWorks in any modern browser

Use cases for migration

  • Investment teams: Share pitch decks with engagement tracking
  • Sales teams: Monitor prospect engagement on materials
  • Due diligence: Create professional data rooms
  • Client portals: Share documents with branded experience
  • Fundraising: Track investor engagement on pitch decks

FAQ

Conclusion

Transitioning from Google Drive to Papermark offers an opportunity to upgrade your document sharing workflow with professional features while maintaining ease of use. With Papermark's intuitive interface and powerful analytics, you can manage your documents more effectively and gain valuable insights into document engagement.

More useful articles from Papermark