One of our customers was managing 5 to 10 concurrent data rooms on Ideals and paying over $30,000 per year. After switching to Papermark, their annual cost dropped to around $2,500 — while gaining features Ideals could not match. Here is what drove the switch and how they did it.
The pain points with Ideals
The cost is hard to justify. Enterprise-level pricing that exceeds $30,000 per year for teams running multiple simultaneous data rooms. For many companies, especially those managing 5 to 10 deals at once, the price tag does not reflect the value they get back.
Multi-party permissions are cumbersome. In most deals, different counterparties need access to different folders within the same data room. On Ideals, setting up and adjusting these permissions is rigid and time-consuming. When one party should see folders 1 through 3 and another should see folders 4 through 6, the system makes this harder than it needs to be.
Analytics lack depth. Deal teams need to know exactly who viewed a document, which pages they spent time on, and when. Ideals offers basic tracking, but not the granular page-by-page analytics with timestamps and full audit logs that teams rely on to gauge counterparty interest and prioritize follow-ups.
Notifications are all-or-nothing. When uploading dozens of documents, teams do not want an alert firing for every single file. They need selective control — notify viewers only about important documents, batch notifications so ten uploads generate one email, and route alerts only to users who have access to the relevant folders.
No modern collaboration tools. Ideals does not offer AI-powered Q&A agents, custom domain branding for data room links, template-based room creation, or bulk folder duplication across deals. These are features that save hours of setup time on every new transaction.
How Papermark solves these pain points
Papermark's Data Rooms Plus plan costs $249 per month at standard pricing, with discounts available for annual commitments bringing the total to around $2,000 to $3,000 per year. That is a 90%+ cost reduction compared to Ideals.
Multi-party access is handled through a granular link-based permissions system. You create a separate link for each party, assign specific folder access per link, and modify permissions in real time without disrupting other users. Each link supports multiple users via an email list.
Papermark provides full page-by-page analytics out of the box — who viewed or downloaded a document, how long they spent on each page, and a complete audit log with timestamps. Notifications are selective and time-batched, so you stay informed without being overwhelmed.
On top of that, you get custom domain branding (e.g. data.yourcompany.com), AI-powered chat agents for Q&A, template-based data room creation, and drag-and-drop bulk uploads with folder structure preserved.
Step 1: Export your Ideals content
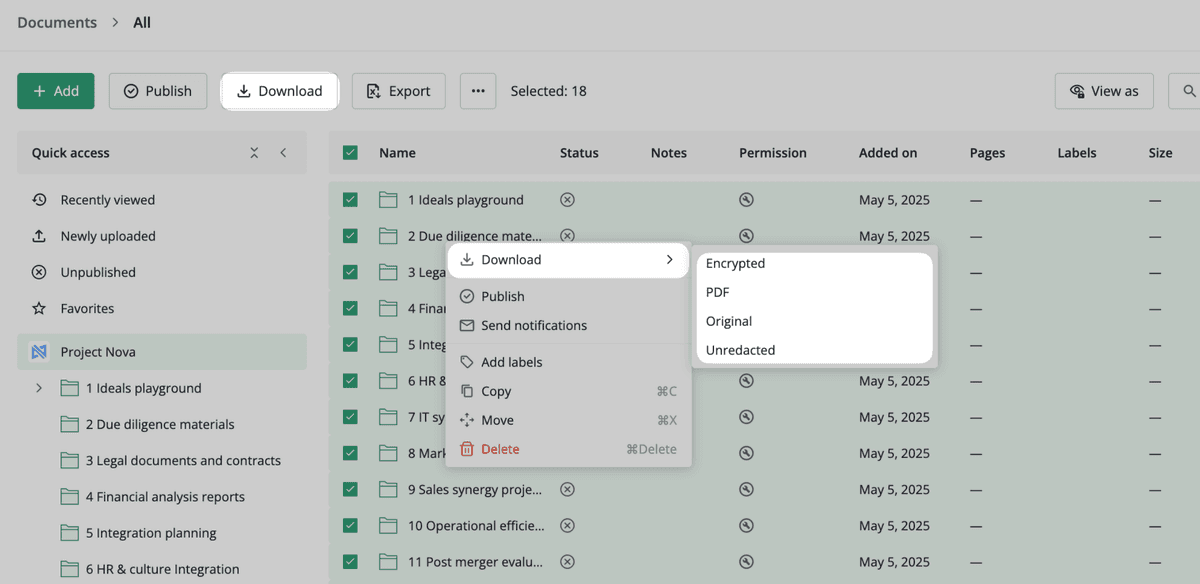
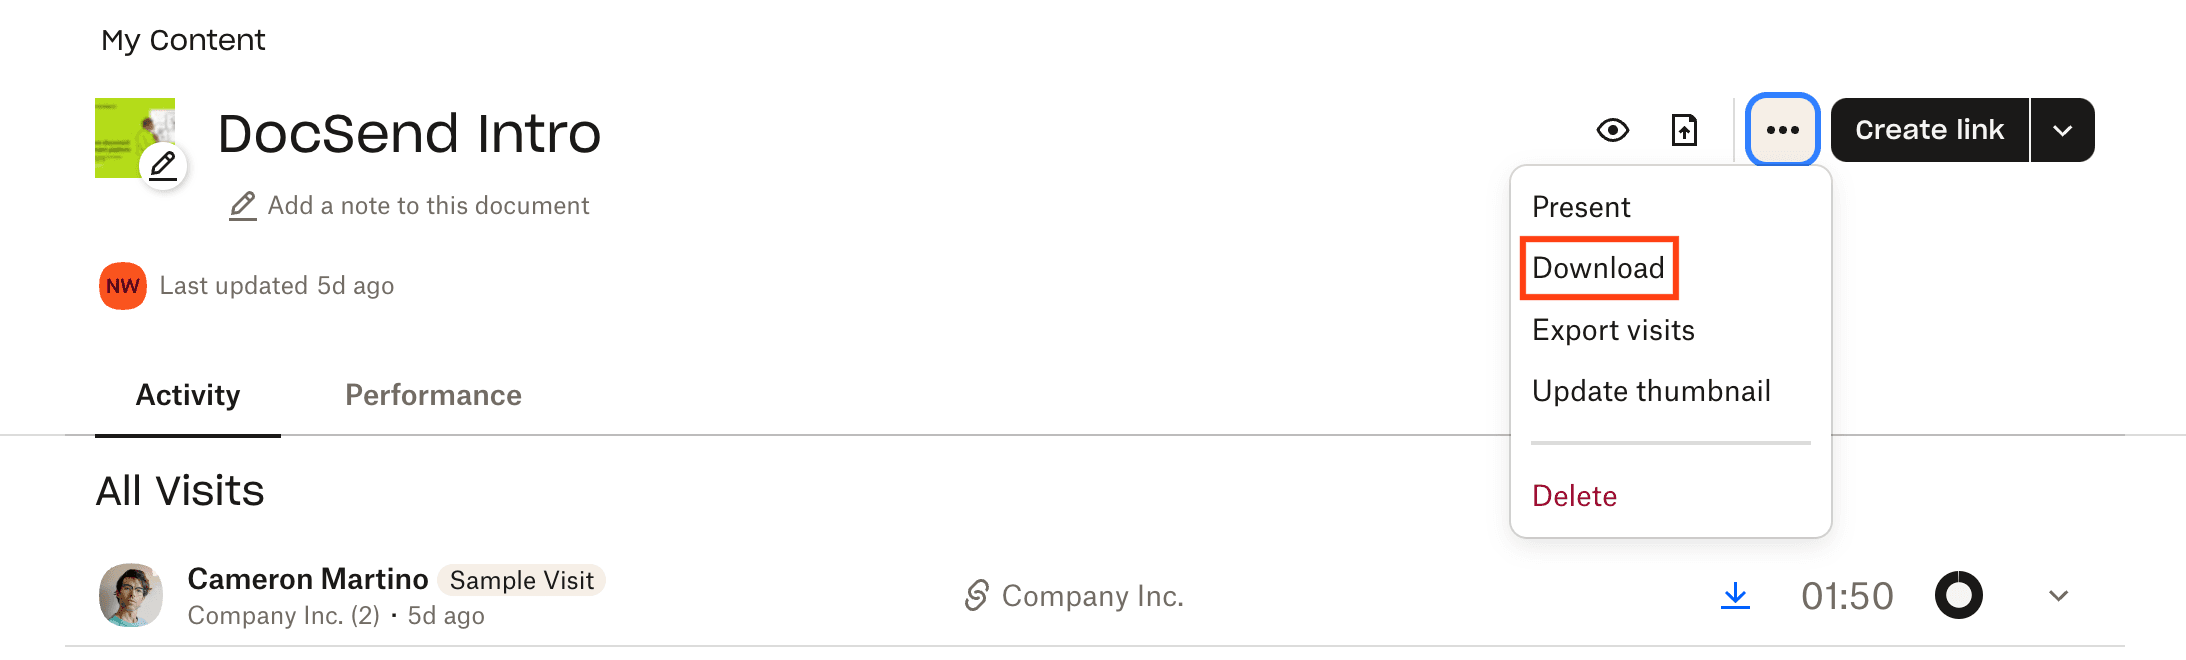
Start by downloading your documents from Ideals. For individual files, select them in the documents list and click "Download" in the top panel. You can choose from several formats depending on your permission level: original format, PDF, encrypted, or unredacted versions for administrators.
For bulk downloads, select the root folder (your project name) in the document tree and click "Download" to receive a ZIP archive. Windows users with long file paths should choose "Keep original names" to maintain structure, or "Truncate names" for compatibility.
Keep in mind that your download options depend on your Ideals permission level. Users with Manage, Upload, or Original permissions get original files, while PDF permission gives converted copies. MS Office documents are downloaded in IRM-encrypted format when encryption is selected.
Step 2: Prepare your files for Papermark
Before uploading, organize your files to mirror your existing folder structure. Papermark supports all major file formats including PDF, Microsoft Office files (DOC, DOCX, XLS, XLSX, PPT, PPTX), spreadsheets (CSV, ODS), images (PNG, JPG), videos (MP4, MOV, AVI, WEBM), CAD files (DWG, DXF), and compressed archives (ZIP).
If you are managing multiple concurrent data rooms in Ideals, plan your migration room by room. Download each data room's contents as a separate ZIP archive and keep the folder hierarchy intact. This makes the upload process much smoother.
Step 3: Upload to Papermark
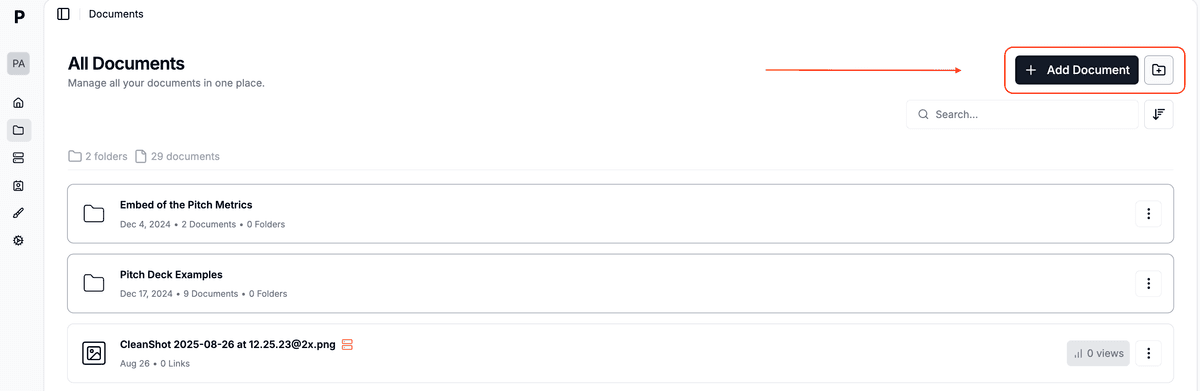
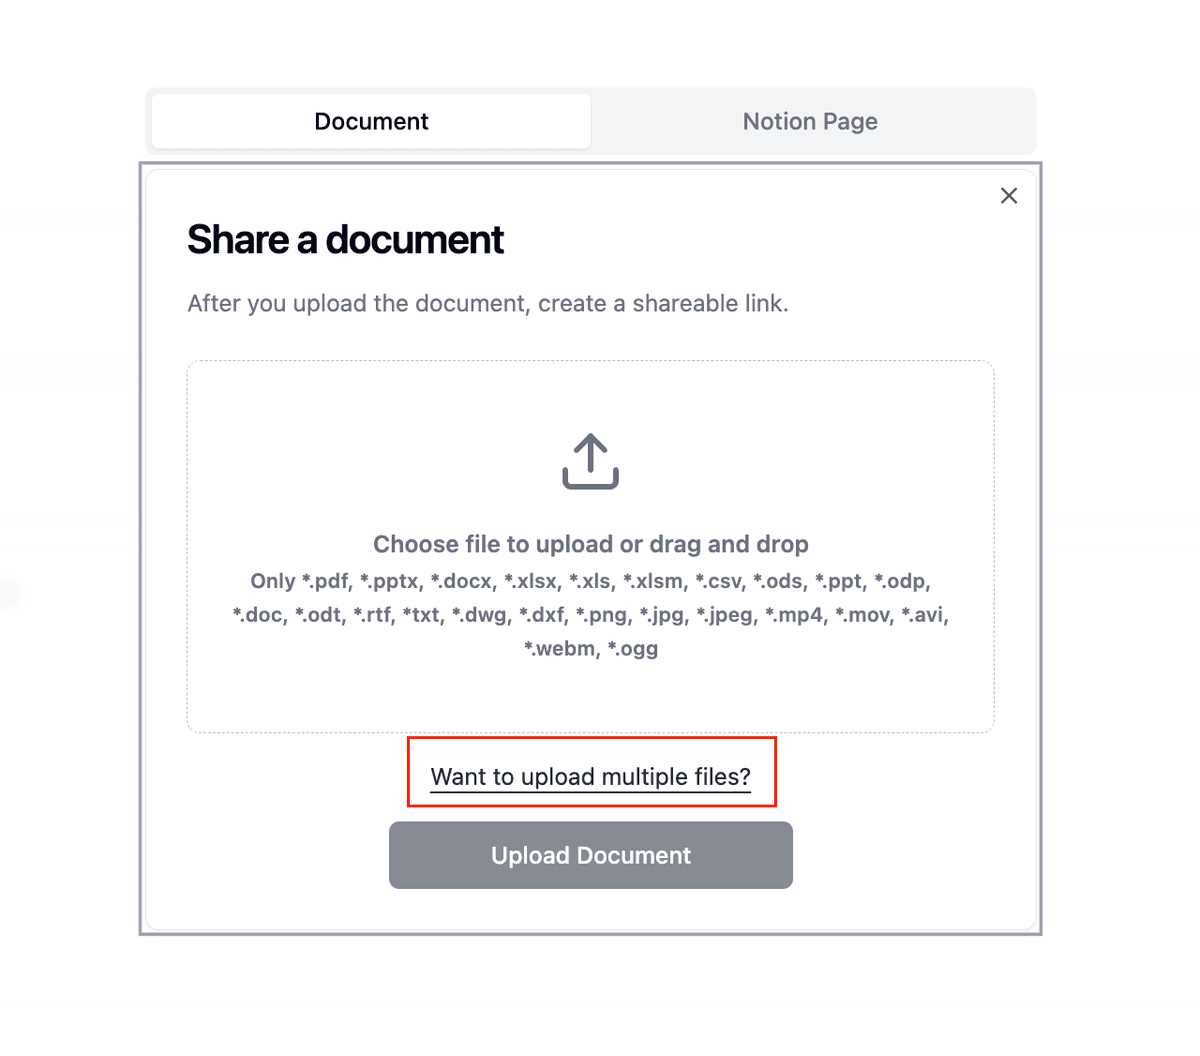
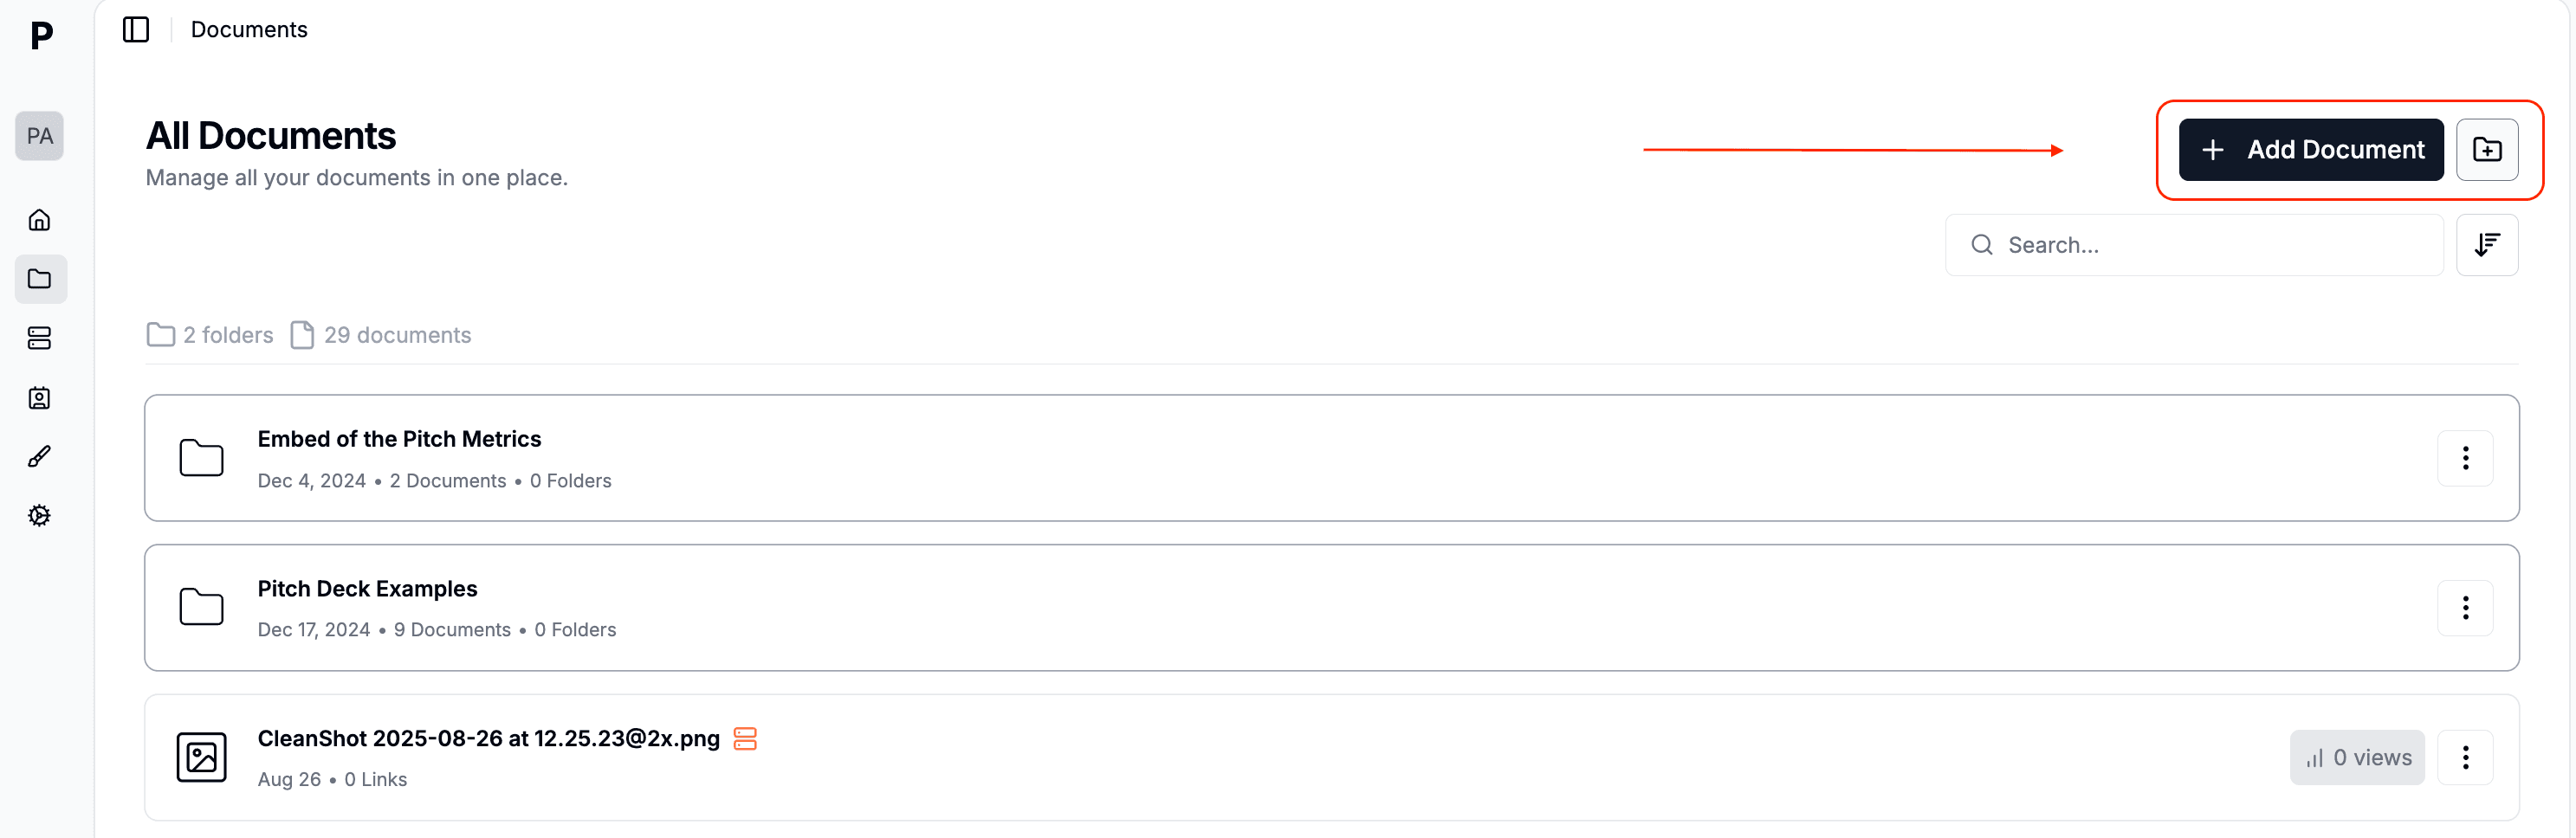
Log in to your Papermark account, navigate to "Documents" in the sidebar, and click "Add Document" in the top right corner. You can upload individual files by clicking or dragging, create folders to match your existing structure, upload multiple files simultaneously, or drag entire folders to preserve their hierarchy.
Papermark supports bulk upload, so you can move large document sets quickly. The folder duplication feature is especially useful when you need to replicate a standard structure across multiple data rooms.
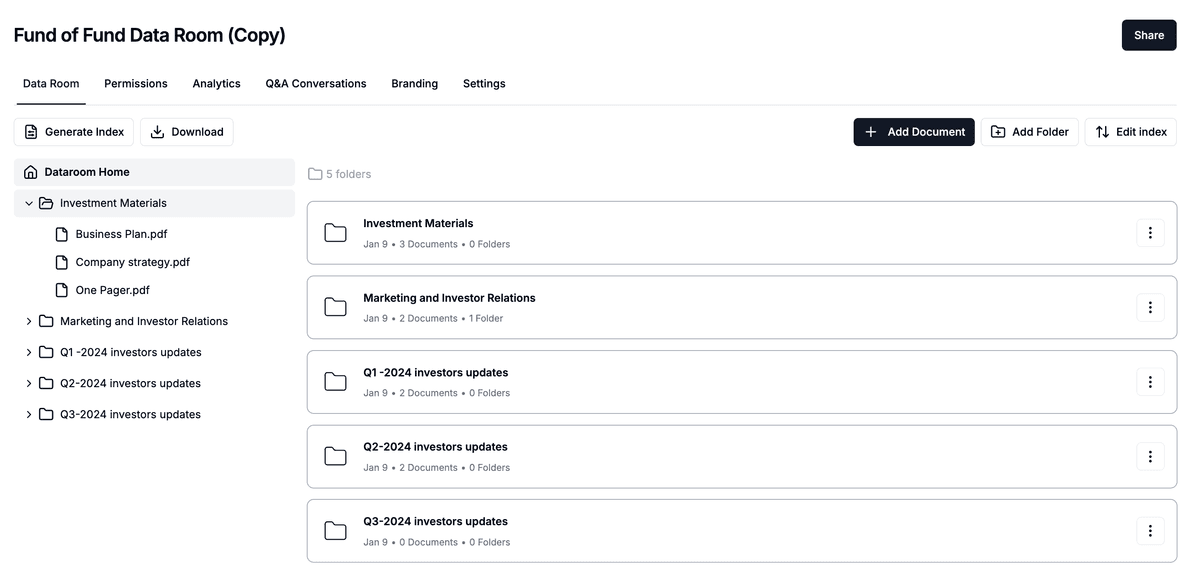
Step 4: Set up your data rooms with multi-party access
Create a new data room by clicking "New Data Room," naming it, and optionally adding a description. If you manage multiple deals, you can use Papermark's template feature to set up standardized room structures and duplicate them for new projects.
One of the most important things to set up correctly is multi-party access. In most deals, different parties need to see different folders within the same data room. Papermark handles this through a granular link-based permissions system. You create a separate link for each party and assign specific folder access to each link. For example, one party might see folders 1 through 3, while another sees folders 4 through 6. You can modify these permissions on existing links in real time, and each link supports multiple users via an email list.
After organizing your documents, configure your security settings. Enable NDA requirements for sensitive deals, set up dynamic watermarking to protect documents, and fine-tune access permissions per link.
Protect your documents with advanced security
No credit card required
Page by page analytics
Require email verification
Require password to view
Allow/Block specified viewers
Apply Watermark
Require NDA to view
Custom Welcome Message
Step 5: Configure notifications and analytics
Papermark gives you control over notifications so you are not overwhelmed by alerts. You can toggle notifications on or off for each upload batch, which is useful when you are uploading dozens of documents but only want to notify viewers about key files. Notifications are also time-batched, meaning ten documents uploaded at once generate a single notification rather than ten separate emails. Only users with access to the relevant folders receive notifications.
For analytics, Papermark tracks every interaction at the document and page level. You can see who viewed or downloaded a specific document, how long they spent on each page, and a complete audit log with timestamps. This is critical for deal teams who need to gauge counterparty interest and prioritize follow-ups.
Ideals vs Papermark comparison
Feature
Ideals
Papermark
Annual cost (5-10 data rooms)
$30,000+/year
~$1,000–$3,000/year
Page-level analytics
Basic tracking
Full page-by-page viewing analytics with timestamps
Multi-party access controls
Complex hierarchy system
Granular link-based permissions per party
Custom domain branding
Limited
Full custom domain support (e.g. data.yourcompany.com)
Notification controls
All-or-nothing alerts
Selective, time-batched notifications per folder
Q&A module
Available
Instant chat + AI-powered chat agents
Data room templates
Not available
Template-based creation with folder duplication
Bulk upload
ZIP archive with path limitations
Drag-and-drop with preserved folder structure
Self-hosting option
Not available
Available (open-source)
Setup time
Complex onboarding process
Quick setup, instant sharing
Use cases for migration
Investment banks managing multiple concurrent deals find that Papermark's per-link permission system and page-level analytics give them better visibility into counterparty engagement at a fraction of the cost.
M&A teams running 5 to 10 simultaneous data rooms benefit from template-based room creation and the ability to duplicate folder structures across deals, saving hours of setup time.
Legal departments appreciate the granular access controls that let them share specific folders with specific parties, combined with audit logs that track every document interaction down to the second.
Corporate finance teams handling sensitive financial documents rely on dynamic watermarking, NDA enforcement, and selective notification controls to manage information flow during transactions.
Real estate firms organizing property documentation and due diligence materials use Papermark's custom domain branding to present a professional, white-labeled experience to buyers and investors.
We saved 70% by transitioning to Papermark. And managed to scale our sales. Our team loves this modern data rooms.
Alonso Benavides Panizo
SVP of Finance at Yuno | Founding team
FAQ
Conclusion
Transitioning from Ideals to Papermark is a straightforward process that can save your team tens of thousands of dollars per year. You get modern page-level analytics, flexible multi-party access controls, custom domain branding, and intelligent notification management — all at roughly $1,000 to $3,000 per year instead of $30,000 or more.
The migration itself is simple: export your documents from Ideals, upload them to Papermark with your folder structure intact, set up link-based permissions for each party, and you are ready to go.