A fund manager launching their first infrastructure fund was evaluating Intralinks for their data rooms. After spending hours on the Intralinks website, they still could not find clear pricing — only a "contact sales" form and estimates starting around €1,000 with no transparency on what the final cost would be. They needed multiple data rooms for fundraising, portfolio management, and deal flow, with the ability to track which investors actually read their materials. After switching to Papermark, they got unlimited data rooms, page-level analytics that showed exactly which portfolio assets investors spent time on, and transparent pricing — all without a single sales call.
This guide walks you through making the same switch.
The pain points with Intralinks
Pricing is completely opaque. Intralinks does not publish pricing on their website. You have to contact sales, go through a discovery process, and wait for a custom quote. For a new fund manager launching their first fund, this is a frustrating barrier. Estimates start around €1,000 but the actual cost depends on usage, features, and contract terms that are never clear upfront.
Enterprise costs are prohibitive for emerging managers. Intralinks is built for large institutions running billion-dollar M&A deals. Their pricing reflects that. For a fund manager setting up their first vehicle — even one with a sophisticated portfolio of infrastructure assets — the enterprise cost structure does not make sense.
The platform requires plugins and training. Downloading documents from Intralinks requires installing a Download Manager plugin. The interface is complex and enterprise-oriented, meaning new team members need significant onboarding before they can use it effectively. Every extra step slows down deal execution.
Analytics lack the depth fund managers need. When sharing materials with potential LPs, fund managers need to know more than "someone opened the document." They need to see which pages each investor spent time on — did they focus on the wind farm assets or the airport concessions? Intralinks offers basic audit trails, but not the granular page-by-page engagement data that helps tailor follow-up conversations.
No modern tools for emerging fund workflows. Intralinks does not offer template libraries for common fund structures, white-label branding for your data room links, or AI-powered Q&A. These are features that save hours of setup time and present a more professional image to prospective investors.
How Papermark solves these pain points
Papermark publishes transparent pricing with no hidden fees. The Data Rooms Plus plan includes unlimited data rooms, unlimited visitors, and unlimited admin users. You know exactly what you are paying before you sign up, and you can start with a 7-day free trial to test everything.
Security is granular and link-based. Every data room link can be configured with email verification, specific viewer allowlists, dynamic watermarking (showing the viewer's email, date, and IP address), and NDA requirements on entry. You control exactly who sees what, without a complex role hierarchy.
The key differentiator for fund managers is page-level analytics. Papermark tracks how long each visitor spends on every page of every document. If you share a portfolio overview with 20 investors, you can see that one spent 8 minutes on the wind farm section while another skipped straight to airport concessions. This lets you tailor every follow-up conversation to what each investor actually cares about.
On top of that, Papermark includes a template library for sales, portfolio management, and fundraising data rooms, white-label branding so your links use your own domain, and AI-powered chat agents for investor Q&A.
Step 1: Export your Intralinks content
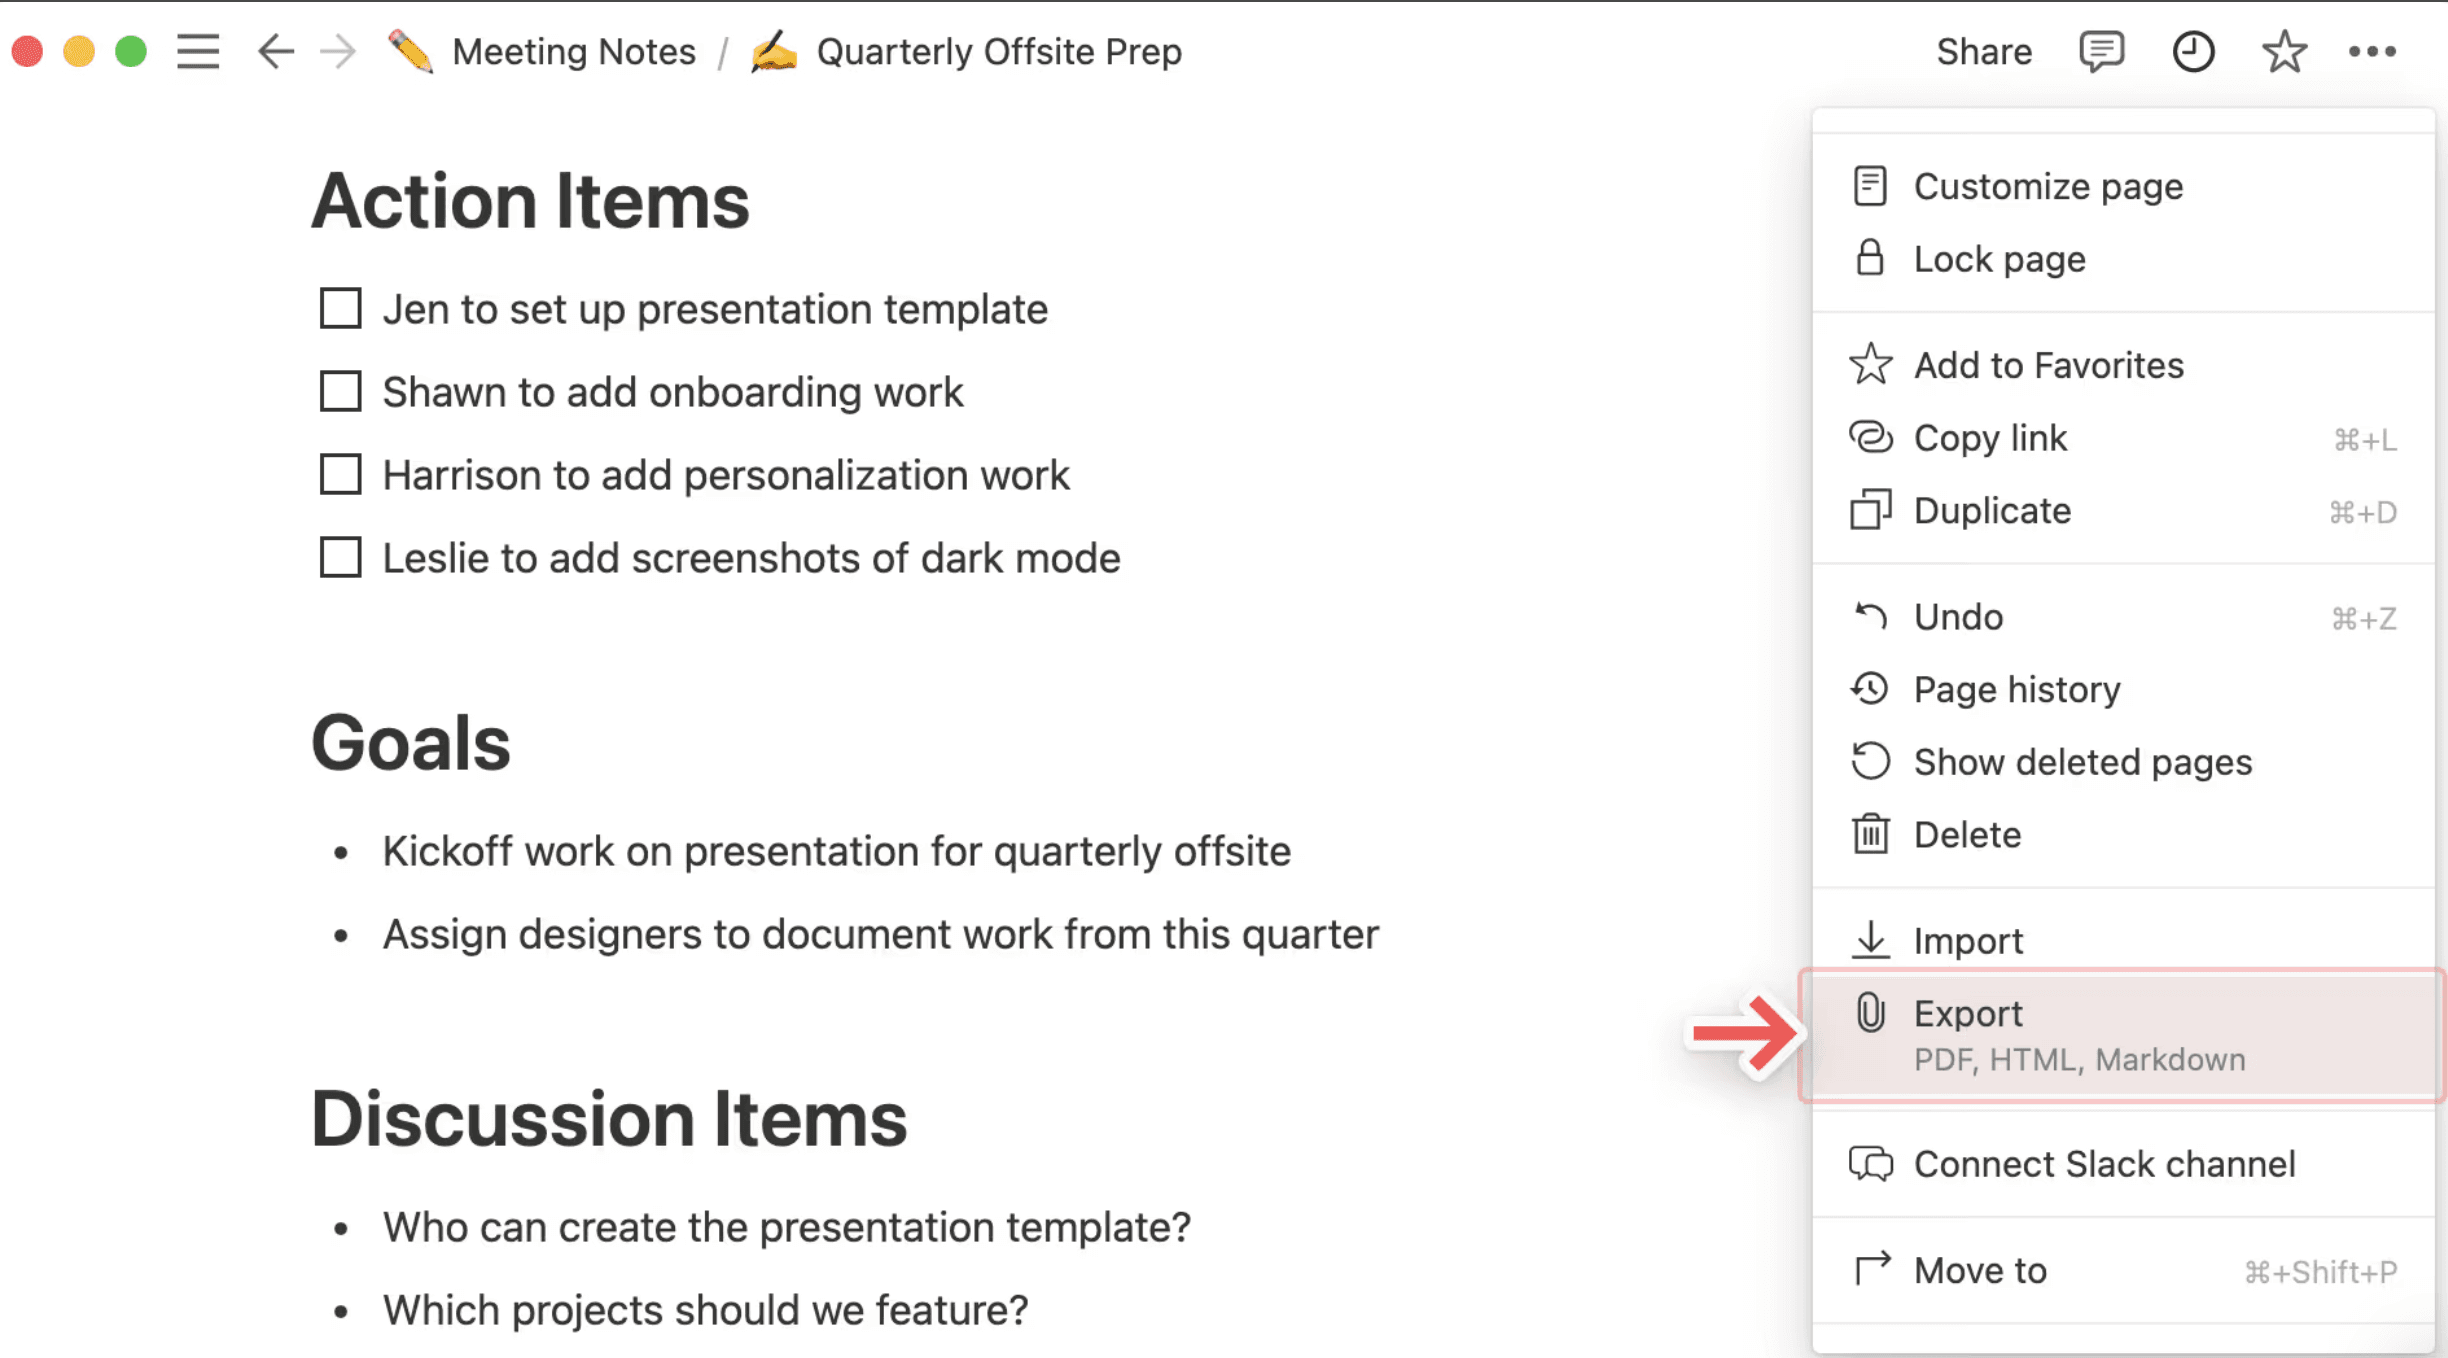
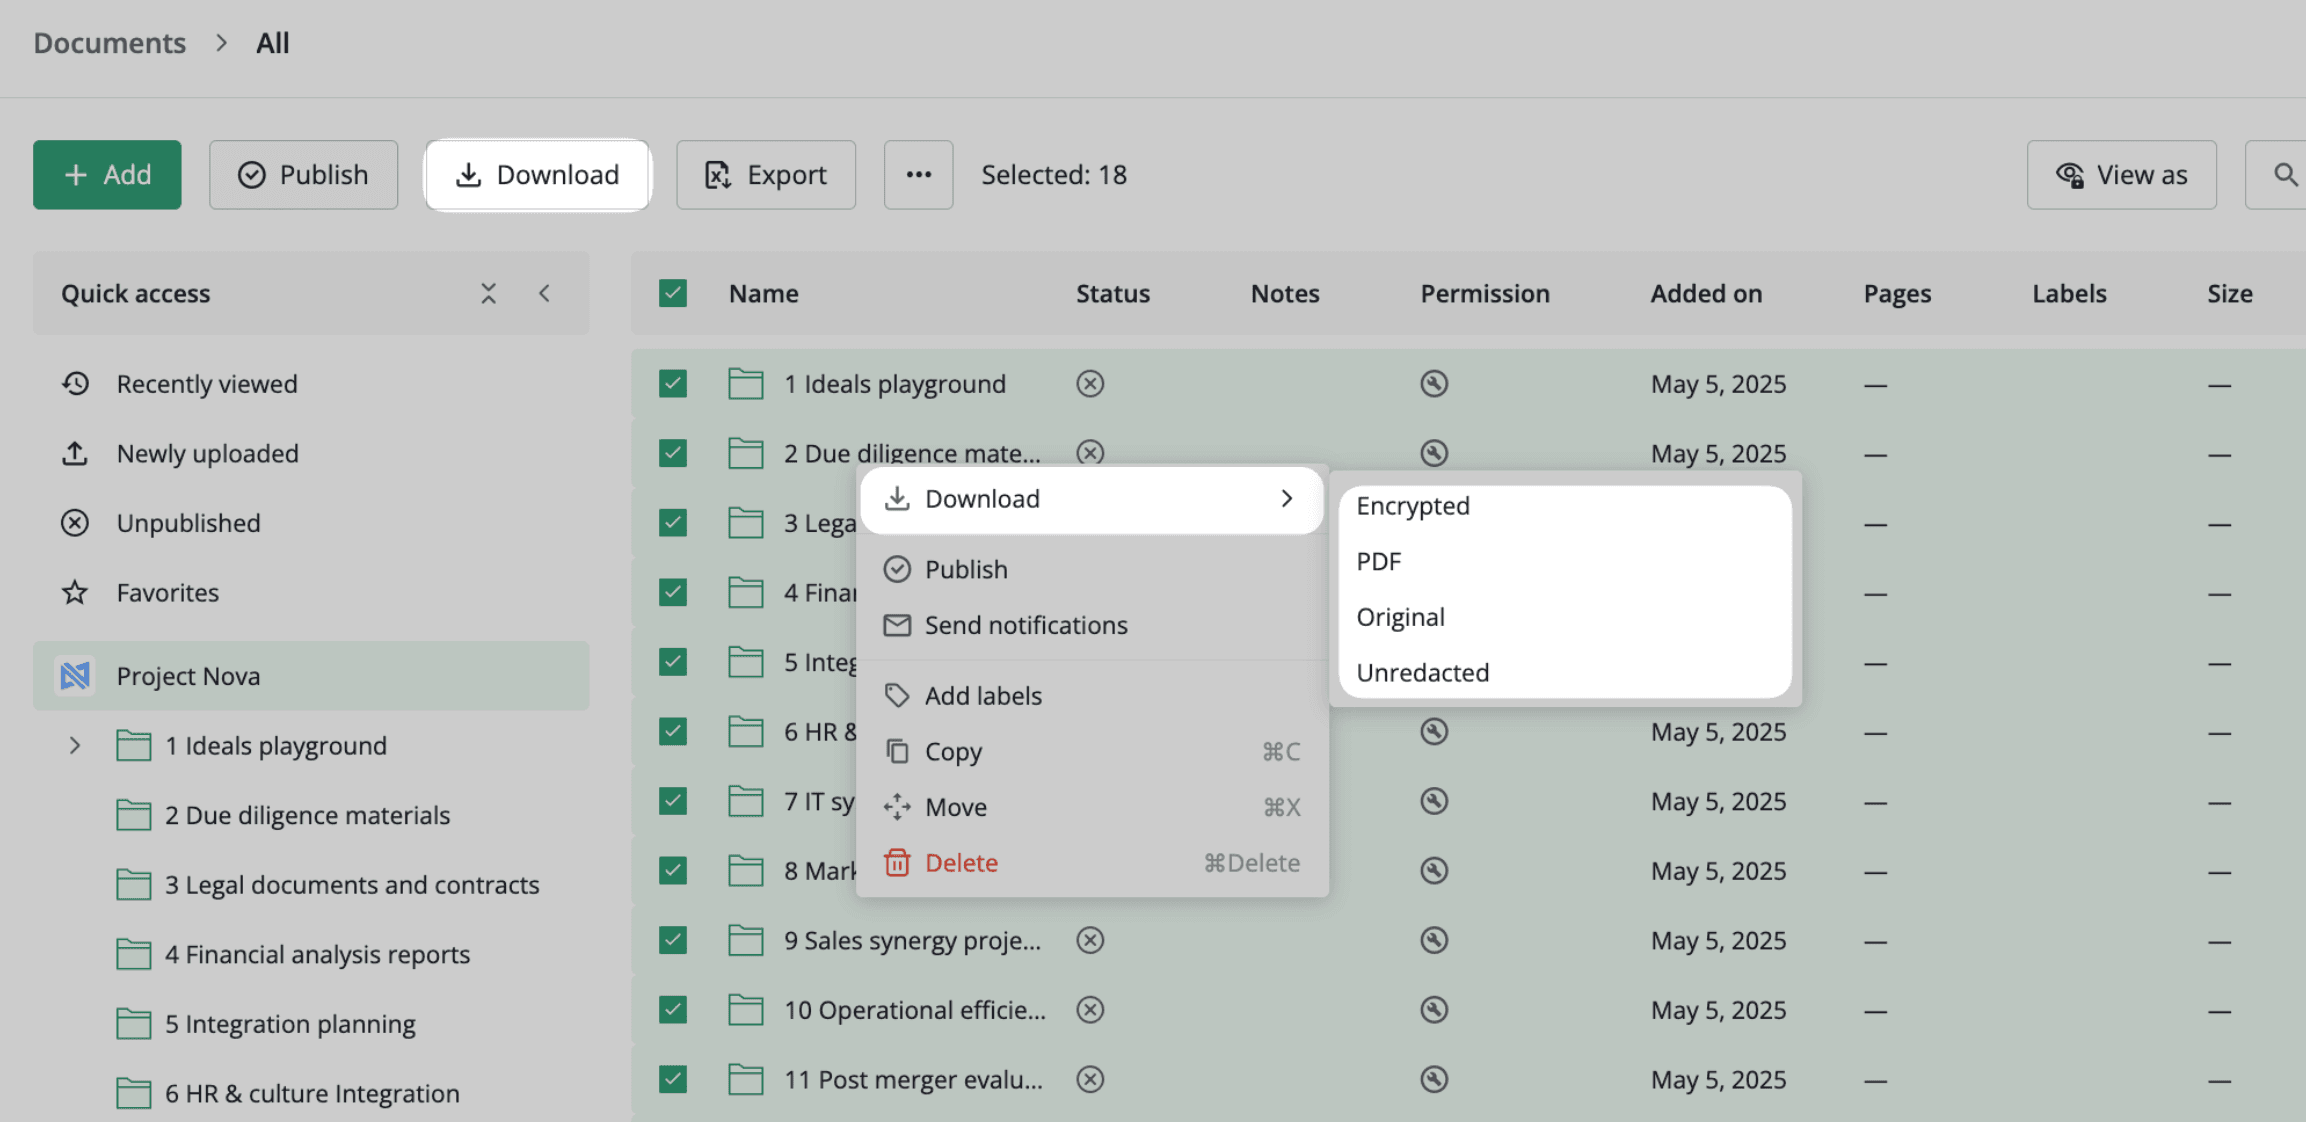
Start by downloading your documents from Intralinks VDRPro. For bulk downloads, navigate to the workspace, select the documents or folders you need, click "Download" in the toolbar, and choose your options — download as ZIP, include metadata, and apply any document protection settings. Wait for the download to prepare, then save it locally.
For individual documents, navigate to the specific file, click the download icon, select your format and protection settings, and download. Keep in mind that bulk downloads require the Download Manager plugin, some files may need format conversion, and protected documents will maintain their watermarks. Save your audit trail information separately before migrating.
Step 2: Prepare your files for Papermark
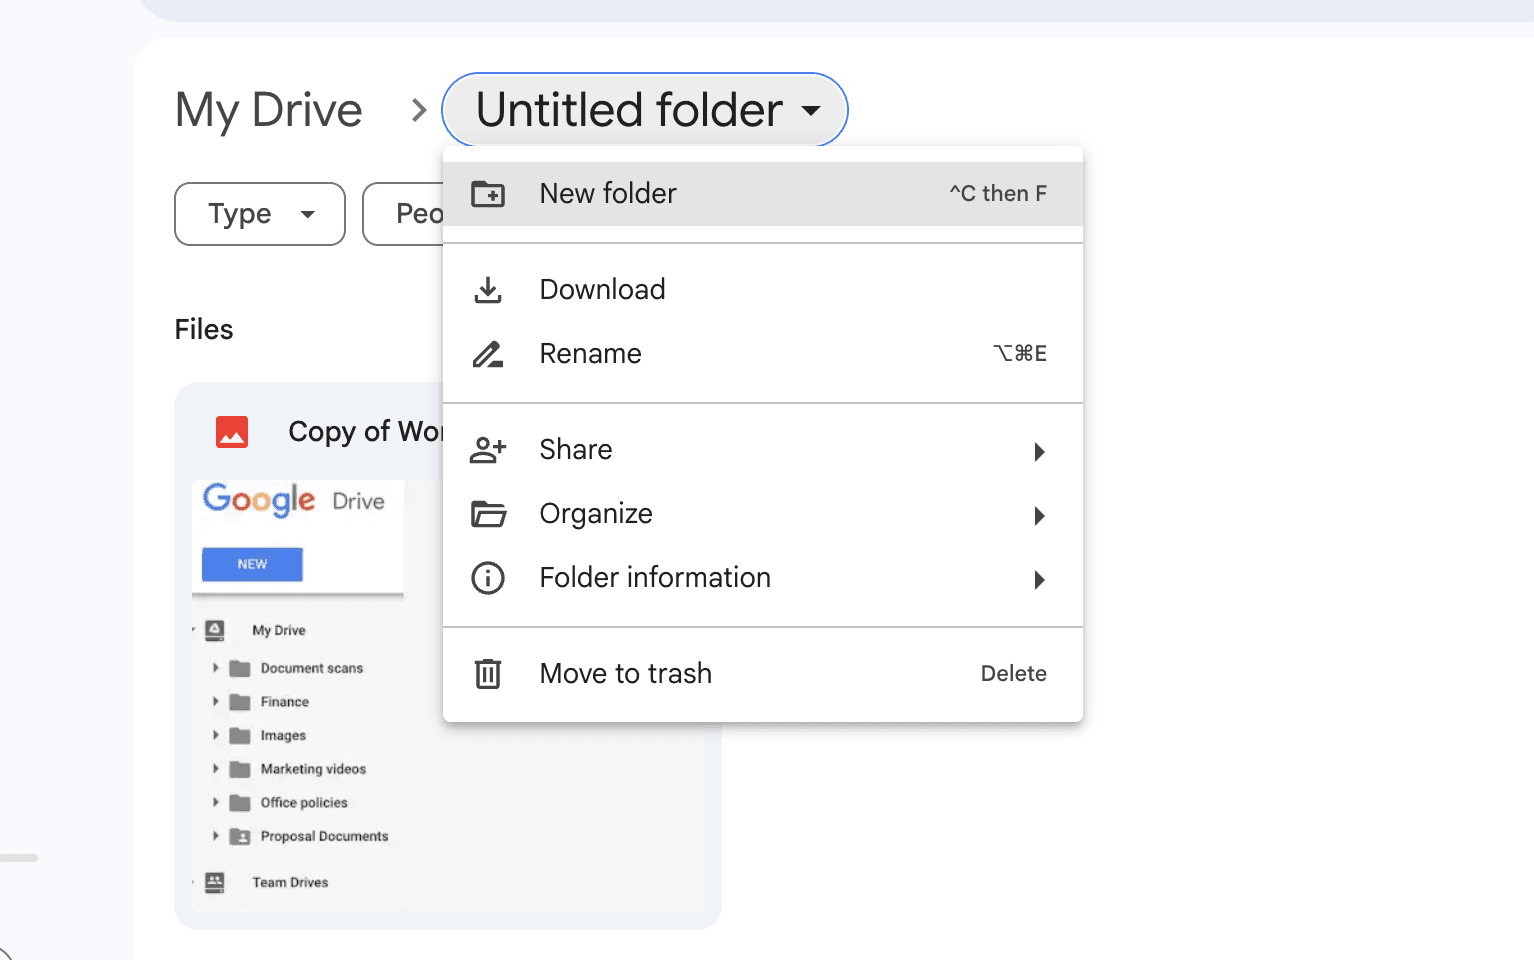
Before uploading, organize your files to mirror your existing folder structure. Papermark supports all major file formats including PDF, Microsoft Office files (DOC, DOCX, XLS, XLSX, PPT, PPTX), spreadsheets (CSV, ODS), images (PNG, JPG), videos (MP4, MOV, AVI, WEBM), CAD files (DWG, DXF), and compressed archives (ZIP).
If you are running multiple data rooms in Intralinks — for example, one for fundraising and another for portfolio management — download each room's contents as a separate archive and keep the folder hierarchy intact. This makes the upload to Papermark much smoother.
Step 3: Upload to Papermark
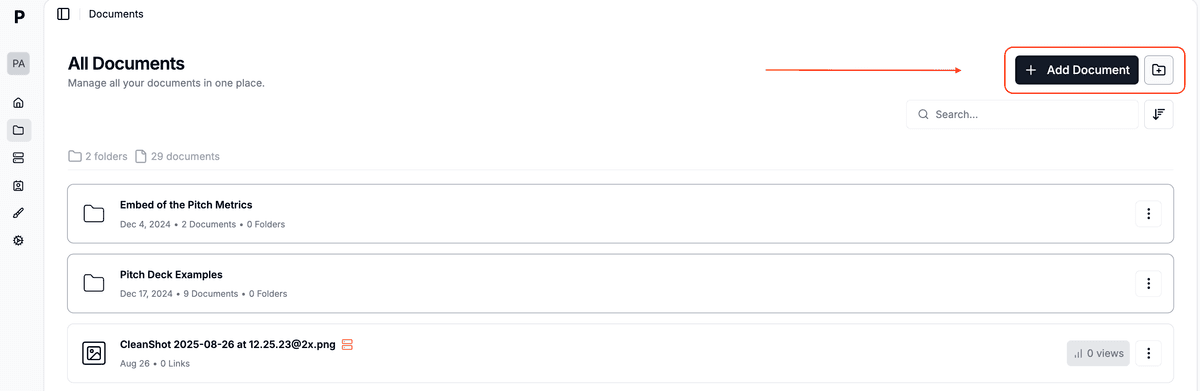
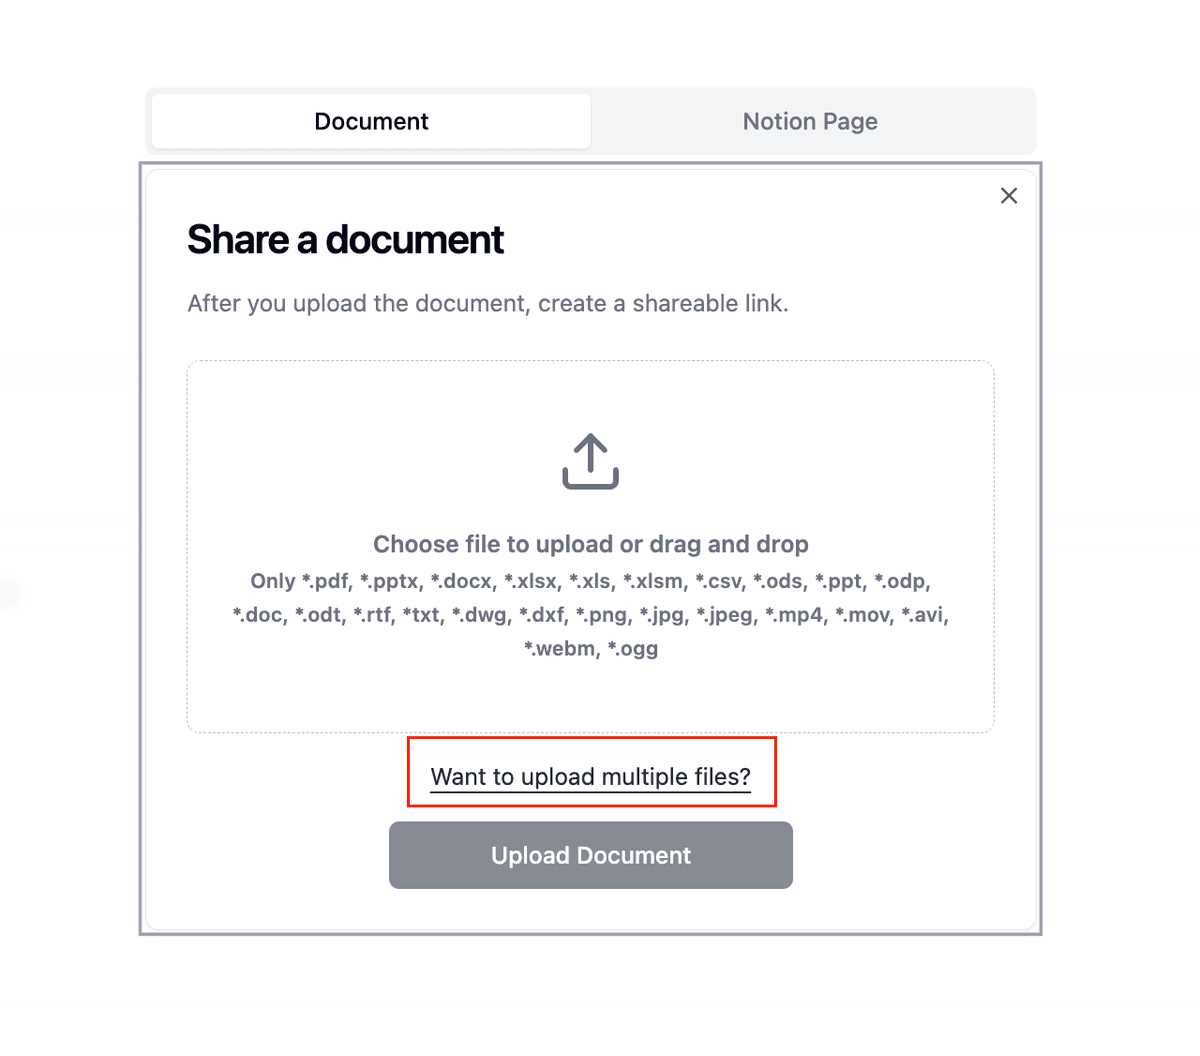
Log in to your Papermark account, navigate to "Documents" in the sidebar, and click "Add Document" in the top right corner. You can upload individual files by clicking or dragging, create folders to replicate your existing structure, upload multiple files simultaneously, or drag entire folders to preserve their hierarchy. No plugins required — everything works directly in your browser.
Papermark supports bulk upload, so large document sets move quickly. If you need the same folder structure across multiple data rooms, the template and duplication features save you from rebuilding it each time.
Papermark made our fundraising process seamless, providing a clean interface and document analytics we loved.
Lewis Carhart
Founder of CompAI
Step 4: Set up your data rooms with investor-grade security
Create a new data room by clicking "New Data Room," naming it, and optionally adding a description. You can start from a blank room or use one of Papermark's built-in templates for fundraising, portfolio management, or sales — each comes with a pre-built folder structure that you can customize.
For each data room, configure your security settings per link. Every shared link can have its own combination of email verification, viewer allowlists, dynamic watermarking, and NDA requirements. This means you can share the same data room with different investor groups but control exactly what each group sees and under what conditions.
White-label branding lets you replace the default Papermark URL with your own custom domain, so investors see a professional, branded experience when accessing your materials.
Protect your documents with advanced security
No credit card required
Page by page analytics
Require email verification
Require password to view
Allow/Block specified viewers
Apply Watermark
Require NDA to view
Custom Welcome Message
Step 5: Use page-level analytics to drive investor conversations
Once your data rooms are live and investors start viewing documents, Papermark's analytics dashboard shows you exactly how each person engages with your materials. You can see time spent on each page per visitor, individual and collective viewing patterns across all your investors, which sections generate the most interest, and complete audit logs with timestamps.
This is where the real value shows up for fund managers. If you share a portfolio deck that covers multiple asset classes, you can see that one LP spent 12 minutes on infrastructure assets while barely glancing at the rest. Another might have focused entirely on financial projections. This data lets you walk into every follow-up call knowing exactly what each investor cares about and what questions to expect.
Intralinks vs Papermark comparison
Feature
Intralinks
Papermark
Pricing transparency
Custom quotes only, no published pricing
Published pricing, no hidden fees
Data rooms included
Per-project pricing
Unlimited data rooms on all plans
Page-level analytics
Basic audit trails
Time per page per visitor with engagement patterns
Built-in templates for fundraising, sales, portfolio
AI-powered Q&A
Not available
AI chat agents controlled by admin
Self-hosting option
Not available
Available (open-source)
Use cases for migration
Emerging fund managers launching their first fund need affordable, transparent data room pricing with professional-grade security. Papermark lets them set up fundraising data rooms in minutes and track LP engagement at the page level — without enterprise sales cycles or opaque quotes.
Infrastructure and PE firms managing diverse portfolios benefit from page-level analytics that reveal which asset classes investors focus on, enabling more targeted follow-up conversations and faster closes.
M&A advisory teams running multiple concurrent deals use Papermark's unlimited data rooms and template system to spin up standardized structures for each transaction, with granular per-link permissions for buyer groups.
Legal teams handling sensitive transaction documents appreciate the per-link security controls — email verification, allowlists, dynamic watermarking, and NDA enforcement — without the complexity of Intralinks' enterprise role system.
Corporate development teams sharing materials with external parties use white-label branding to present data rooms under their own domain, creating a seamless, professional experience for counterparties.
FAQ
Conclusion
Transitioning from Intralinks to Papermark replaces opaque enterprise pricing and complex onboarding with a transparent, self-serve platform that you can set up in minutes. You get unlimited data rooms, page-level analytics that show exactly how investors engage with your materials, and granular security controls — all without a sales call or plugin installation.
The migration itself is straightforward: export your documents from Intralinks, upload them to Papermark with your folder structure intact, configure per-link security settings, and start tracking investor engagement from day one.