Comment activer les demandes de fichiers dans votre data room ?
Besoin de collecter des documents de manière sécurisée auprès de parties externes ? Les data rooms de Papermark vous permettent de créer des liens qui autorisent d'autres personnes à téléverser des fichiers directement dans votre data room de façon sécurisée et organisée.
Tous les envois de fichiers sont suivis dans vos analyses, vous donnant un registre clair de qui a soumis quoi et quand.
Les demandes de fichiers peuvent être activées via les paramètres de partage de votre data room. Voici comment trouver et activer cette fonctionnalité.
Configuration étape par étape
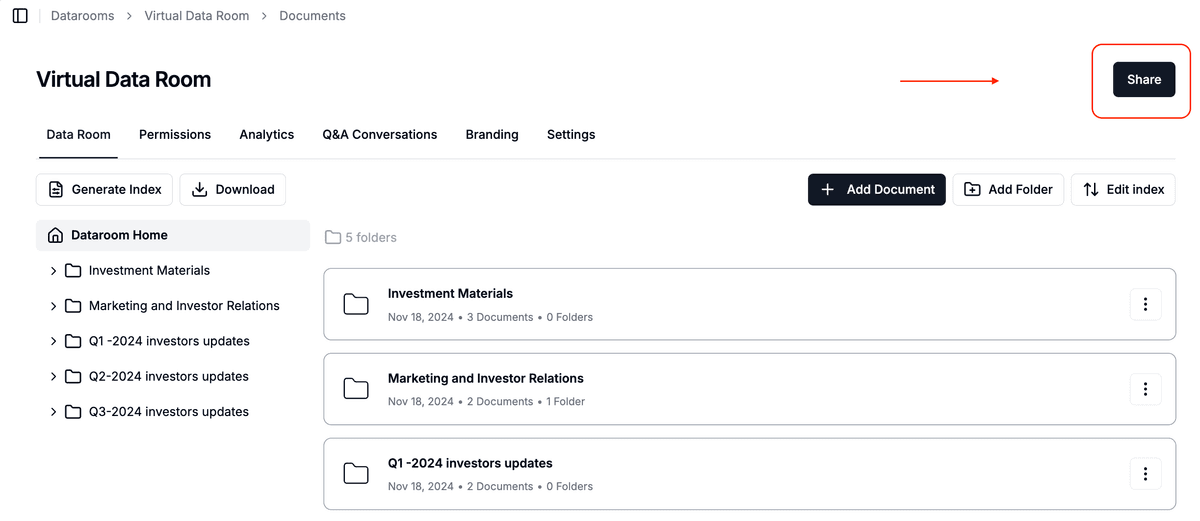
- Accédez à votre data room – Depuis votre tableau de bord :
- Cliquez sur "Datarooms" dans la barre latérale
- Sélectionnez la data room que vous souhaitez configurer
-
Accédez aux paramètres de partage – Dans votre data room :
- Cliquez sur le bouton "Partager"
- Cela ouvrira le panneau de création de lien
-
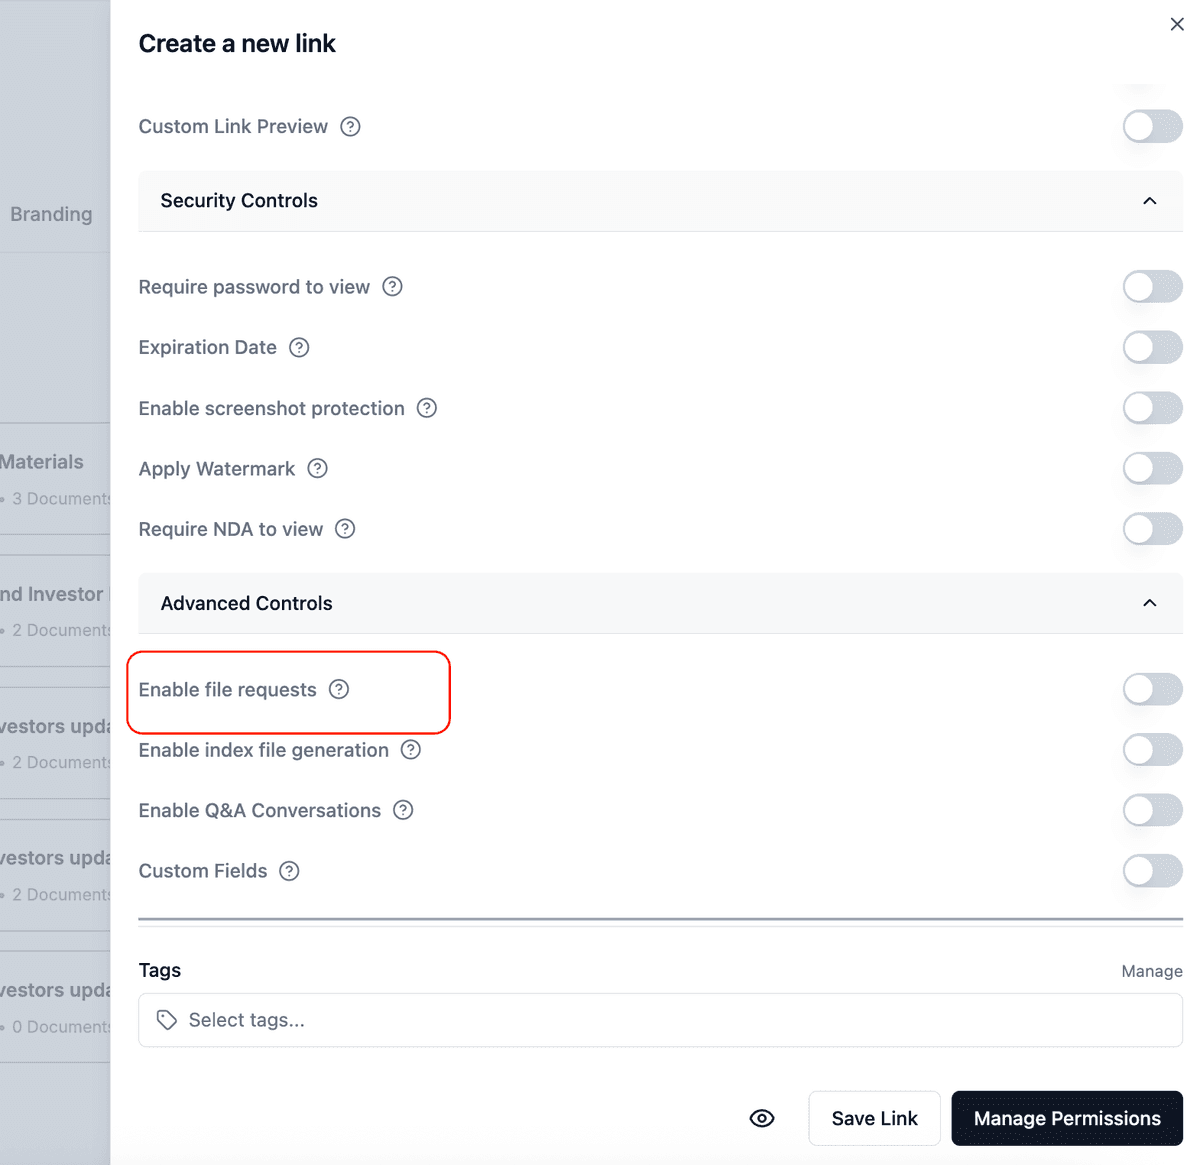
Trouvez les paramètres de demande de fichiers – Dans les paramètres de lien :
- Faites défiler pour trouver "Contrôles avancés"
- Cliquez pour développer la section
-
Activez les demandes de fichiers – Dans les Contrôles avancés :
- Trouvez "Activer les demandes de fichiers"
- Basculez l'interrupteur pour permettre aux visiteurs de téléverser des fichiers
- Vous verrez le message "Les visiteurs peuvent téléverser des fichiers dans la dataroom"
- Configurez le dossier de téléversement (Optionnel) :
- Cherchez "Téléverser dans un dossier spécifique"
- Soit :
- Laissez vide pour permettre aux visiteurs de choisir le dossier
- Sélectionnez un dossier spécifique pour tous les téléversements
- Utilisez le menu déroulant pour choisir le dossier de destination

-
Définir la sécurité supplémentaire – Envisagez d'activer :
- Protection par mot de passe
- Date d'expiration
- Protection contre les captures d'écran
- Filigrane
- Exigence d'un accord de confidentialité
-
Personnaliser l'expérience – Paramètres optionnels :
- Activer les conversations Q&R pour :
- Permettre aux visiteurs de poser des questions sur les téléchargements
- Discuter des exigences directement dans la data room
- Garder toutes les communications au même endroit
- Ajouter des champs personnalisés pour recueillir :
- Informations sur l'entreprise
- Détails du projet
- Descriptions des documents
- Contexte supplémentaire sur les téléchargements
- Activer la génération de fichier d'index
- Ajouter des tags pour l'organisation
- Activer les conversations Q&R pour :
Gestion des demandes de fichiers
Après avoir activé les demandes de fichiers, vous pouvez :
- Surveiller les téléchargements en temps réel
- Examiner les fichiers avant de les accepter
- Organiser les soumissions dans des dossiers
- Suivre les analyses pour tous les téléchargements
Conseils pour réussir
- Activez la protection par mot de passe pour les téléchargements sensibles
- Définissez une date d'expiration pour les demandes urgentes
- Utilisez des champs personnalisés pour recueillir du contexte supplémentaire
- Activez les Q&R si vous devez communiquer avec les utilisateurs qui téléchargent
- Révisez régulièrement les paramètres de sécurité
- Envisagez d'exiger des accords de confidentialité pour les documents confidentiels
Questions fréquentes
Guides associés
Besoin d'aide ? Contactez support@papermark.com ou utilisez le chat intégré à l'application.