
How to require NDA agreement before viewing documents?

Ensuring that viewers sign a Non-Disclosure Agreement (NDA) before accessing your documents is crucial for maintaining confidentiality and protecting sensitive information. With Papermark, you can easily set this up by connecting your NDA to your document links. This guide will walk you through the steps to connect an NDA agreement before viewers can access your documents in Papermark.
Step 1: Add Documents or Create a Data Room
First, you need to add the documents you want to share or create a Data Room to organize multiple files and folders. Here’s how:
- Log into your Papermark account.
- Navigate to the "Upload" section to add individual documents, or go to "Create Data Room" to organize your files into a structured folder.
- Upload your documents or set up your Data Room with the necessary files.
Step 2: Create a shareable link
Once your documents or Data Room are ready, the next step is to create a shareable link:
- Go to the document or Data Room dashboard.
- Find and click the "Create Link" option to generate a unique link for sharing.
Step 3: Configure link settings and select agreements
To ensure viewers sign your NDA before accessing the documents, you need to configure the link settings:
- Access the link settings. This option is usually available when creating or editing your shareable link.
- Select the "Agreements" option in the link settings.
Step 4: Connect your NDA agreement
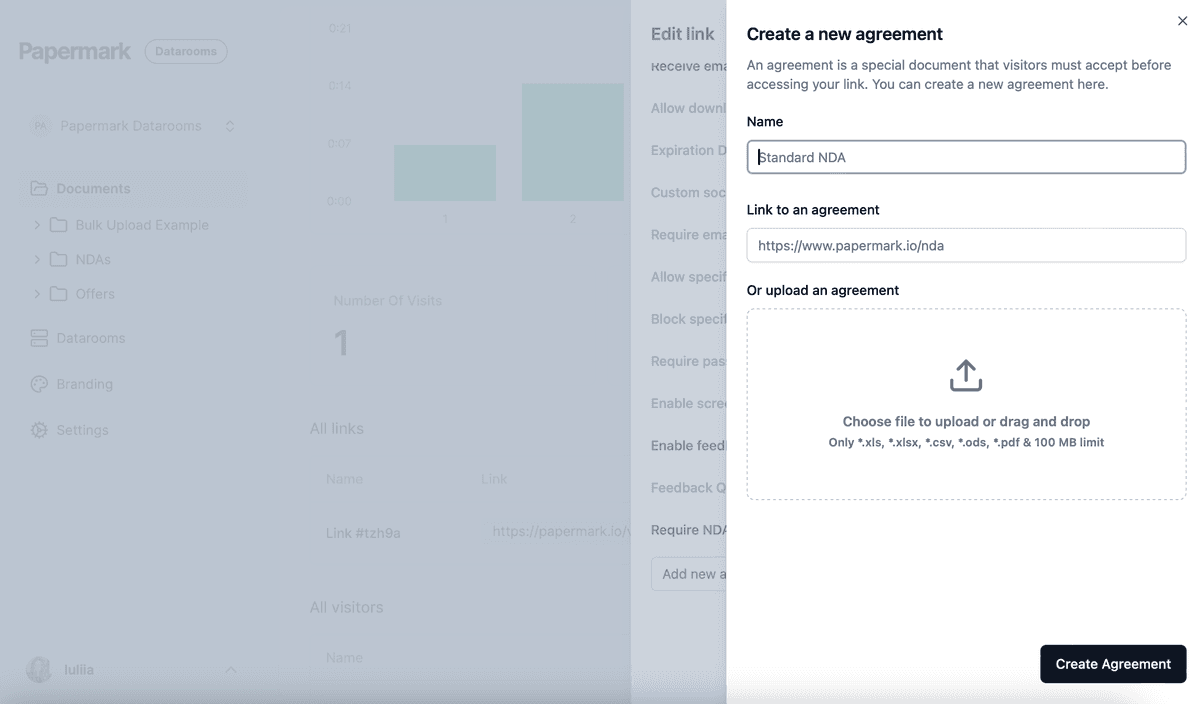
Papermark offers a few ways to connect your NDA agreement:
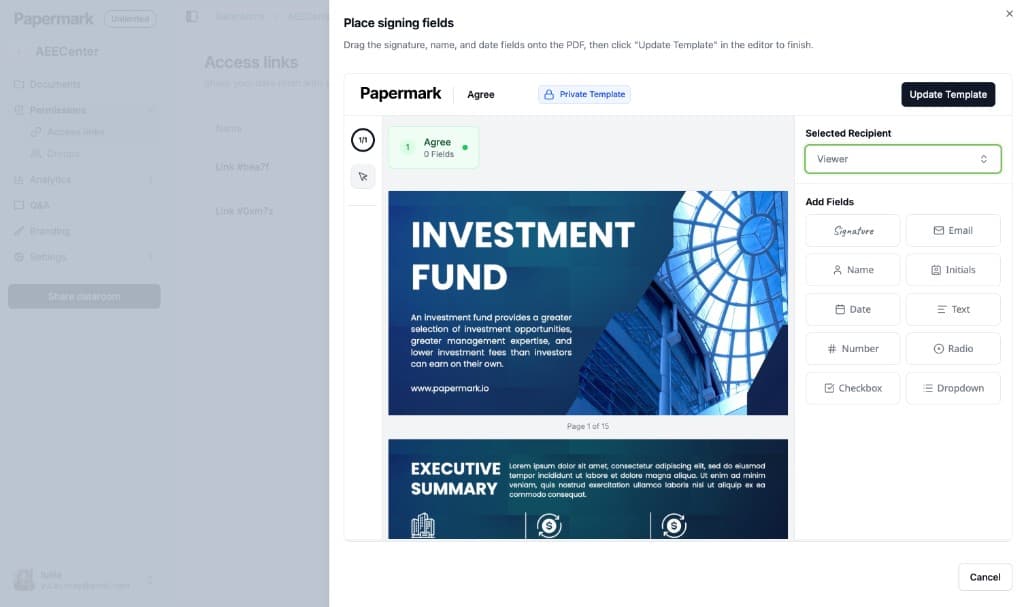
- Signing template (recommended): Upload your NDA as a PDF and place fields on it (signature, name, email, initials, date, text, and more), then assign them to the viewer. The viewer signs the document inside Papermark before they get access.
- Link to an online agreement: Provide a URL to your NDA hosted online; the viewer accepts it with a checkbox.
- Upload a PDF or paste text: Add a PDF or plain-text agreement the viewer accepts with a checkbox.
Choose the method that suits your needs and ensure your NDA is correctly set up.
When you use a signing template, you place and assign the fields the viewer must complete, then click Update Template to save it.
NDA agreements are available on the Data Rooms plan (and during the free trial).
Step 5: Share the link
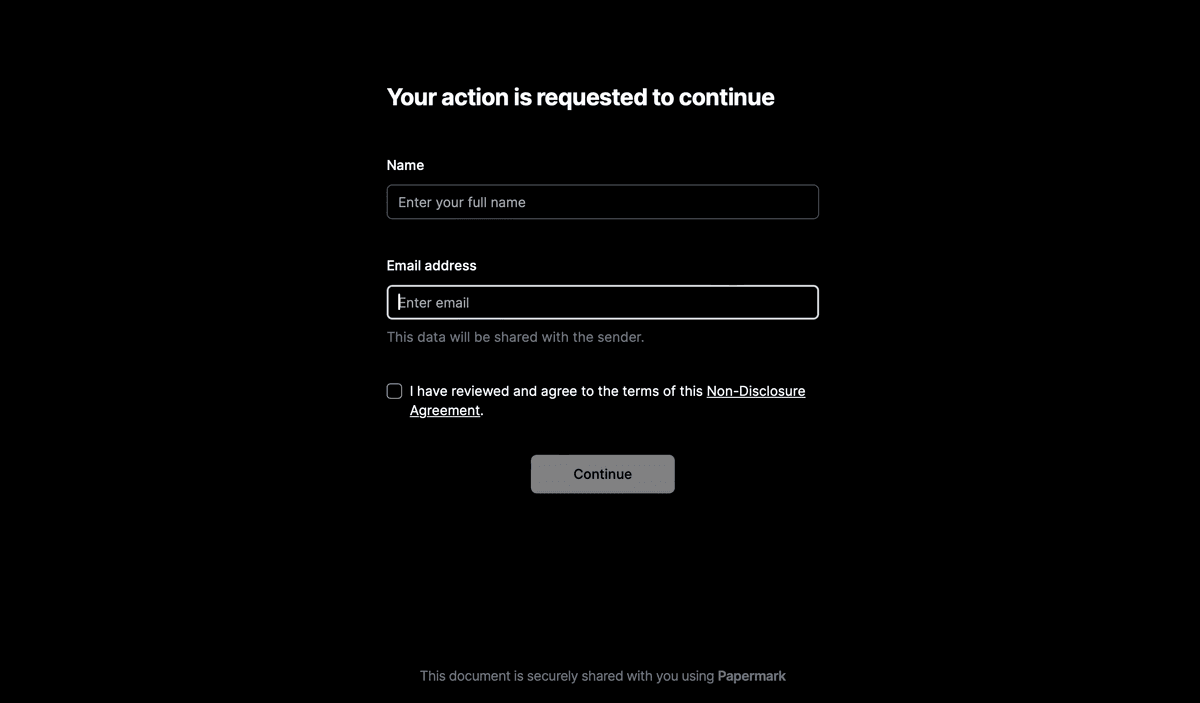
After setting up the NDA agreement, you can now share the link with your intended recipients. The viewers will be required to sign the NDA before gaining access to the documents. The viewer in the entracne to the document will be required to accept NDA.
Step 6: Track NDA agreement acceptance
Papermark’s analytics feature allows you to track who has signed the NDA agreement:
- Navigate to the analytics section of your Papermark dashboard.
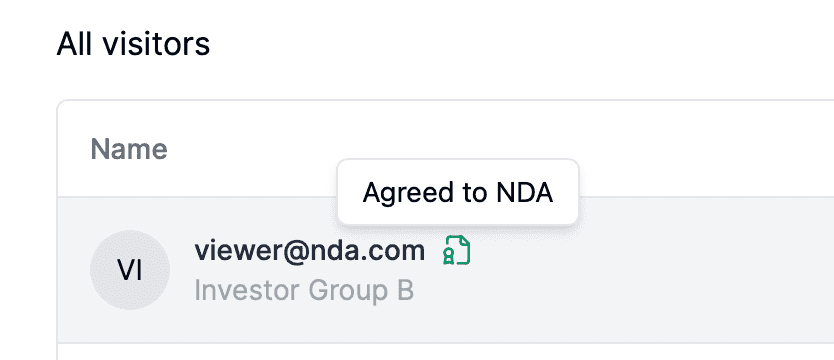
- Monitor the activity to see who signed or accepted the NDA and when.
Each acceptance is recorded with the signer's name, email, and timestamp, and the signed PDF is saved so you can download it later. This ensures you can verify that all viewers have agreed to the terms before accessing your documents.
Conclusion
Connecting an NDA agreement before allowing viewers to access your documents in Papermark is a straightforward process that enhances security and confidentiality. By following these steps, you can ensure that all viewers sign the necessary agreements, and you can track their acceptance through Papermark’s robust analytics features.