BlogSecure File Sharing in 2026: 8 Steps to Protect Sensitive Documents (with Audit Trail)

Secure File Sharing in 2026: 8 Steps to Protect Sensitive Documents (with Audit Trail)

2 min read
Marc Seitz

Marc Seitz

Secure File Sharing

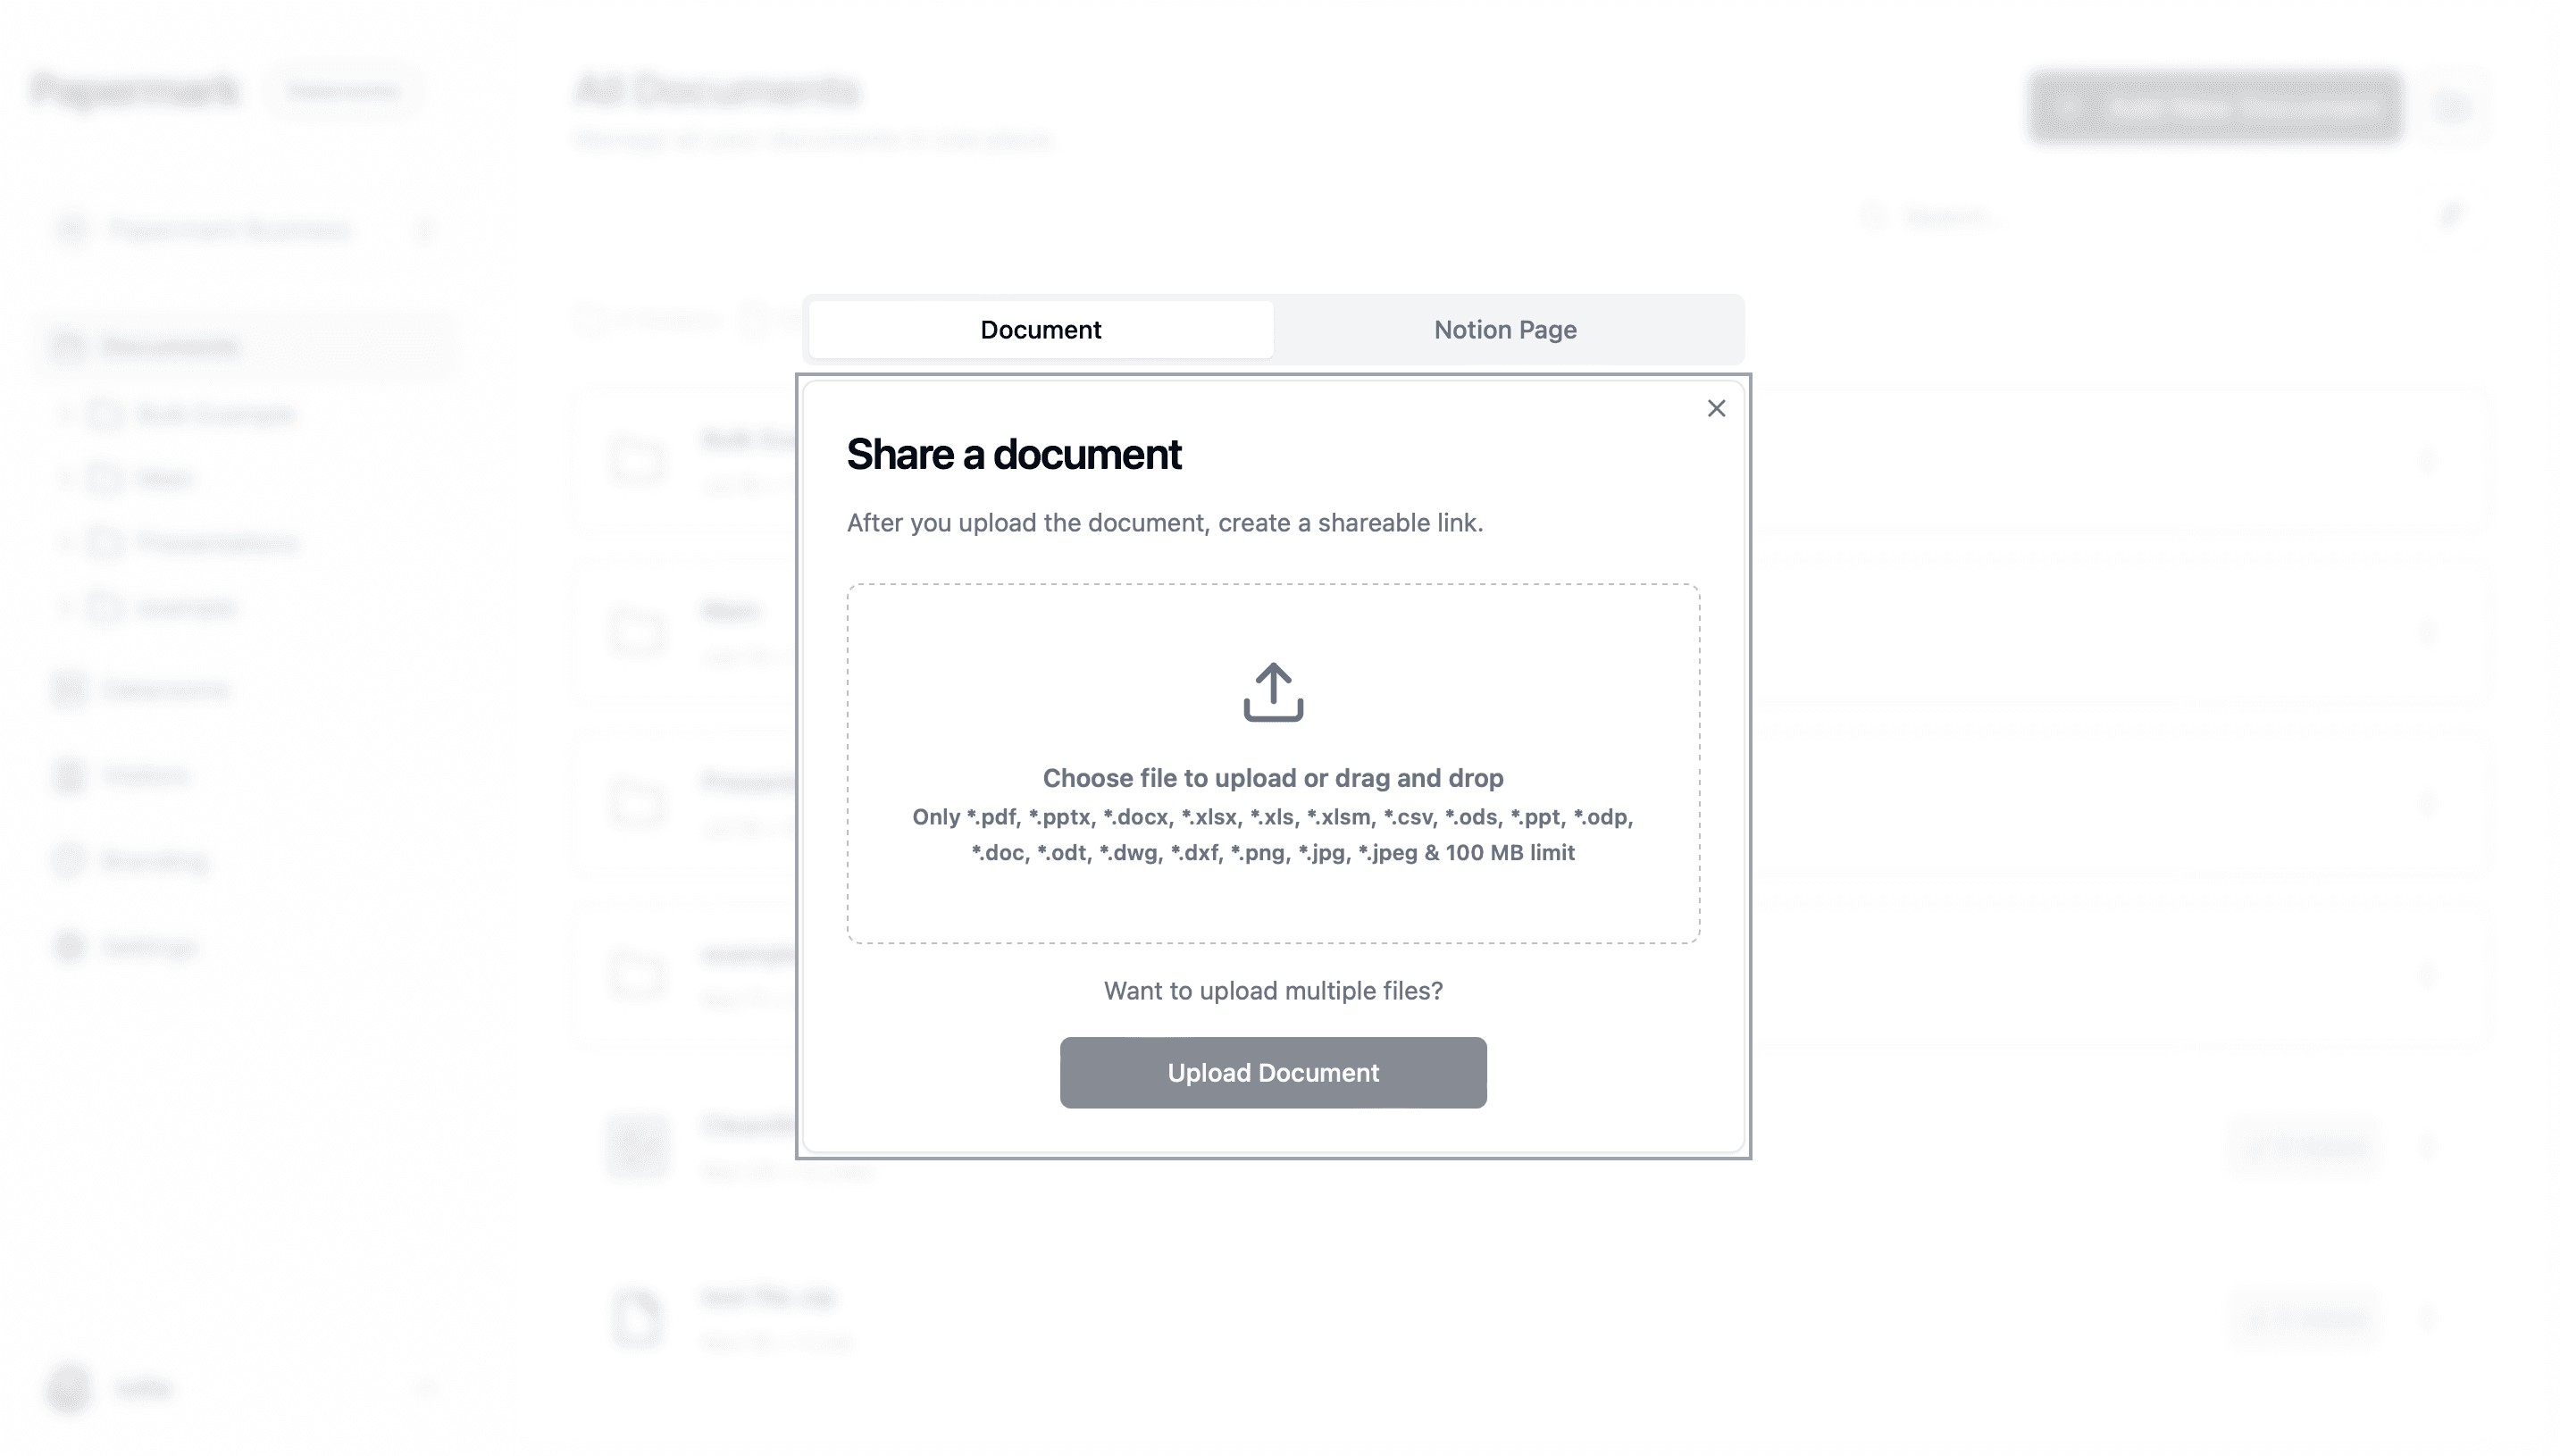
Sharing sensitive documents in 2026 is not just about sending a link. It is about protecting confidential information end-to-end: encryption in transit and at rest, NDA gating before any document loads, dynamic per-session watermarking, link expiration, and an immutable audit trail. This guide walks the 8-step setup that financial reports, legal contracts, and IP get shared with in serious workflows.

Quick recap

  • Secure file sharing sends sensitive documents through a controlled platform with encryption, access controls, and audit logging instead of raw email attachments.
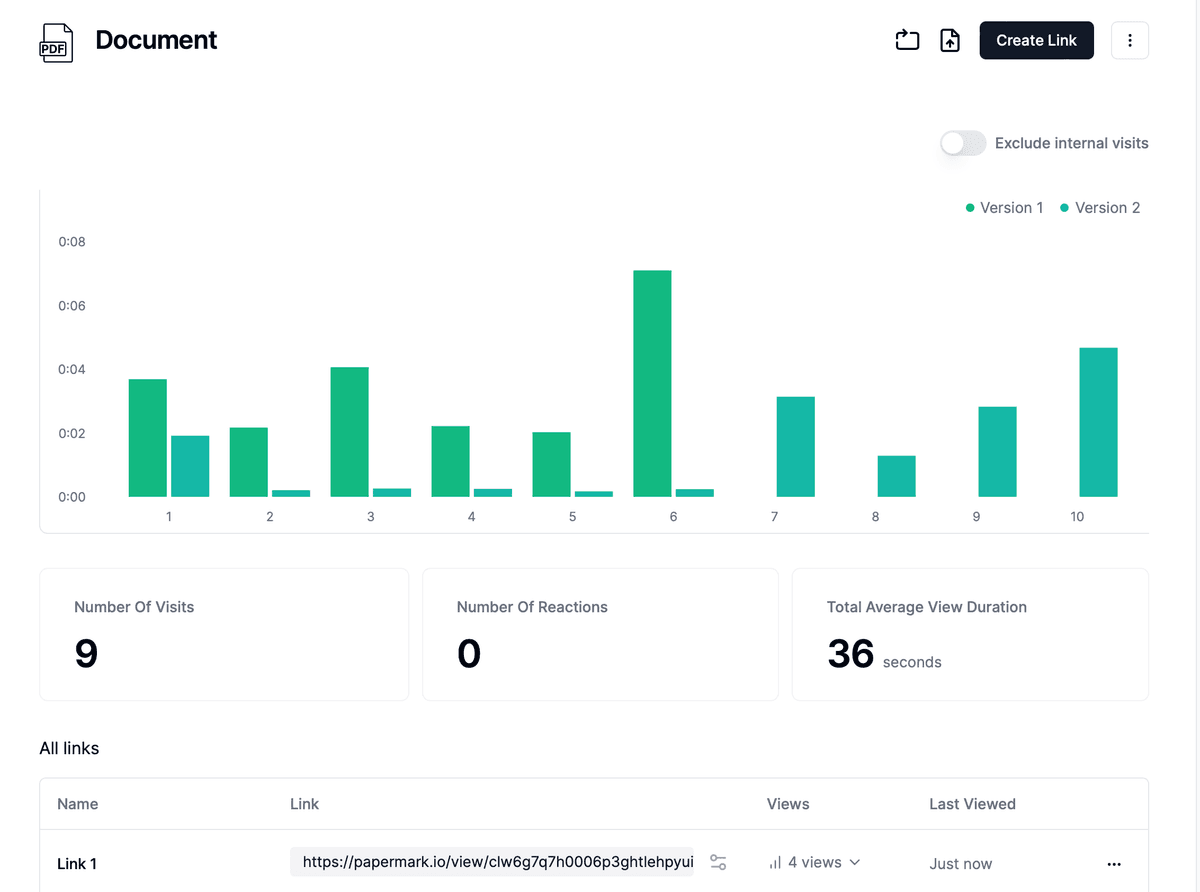
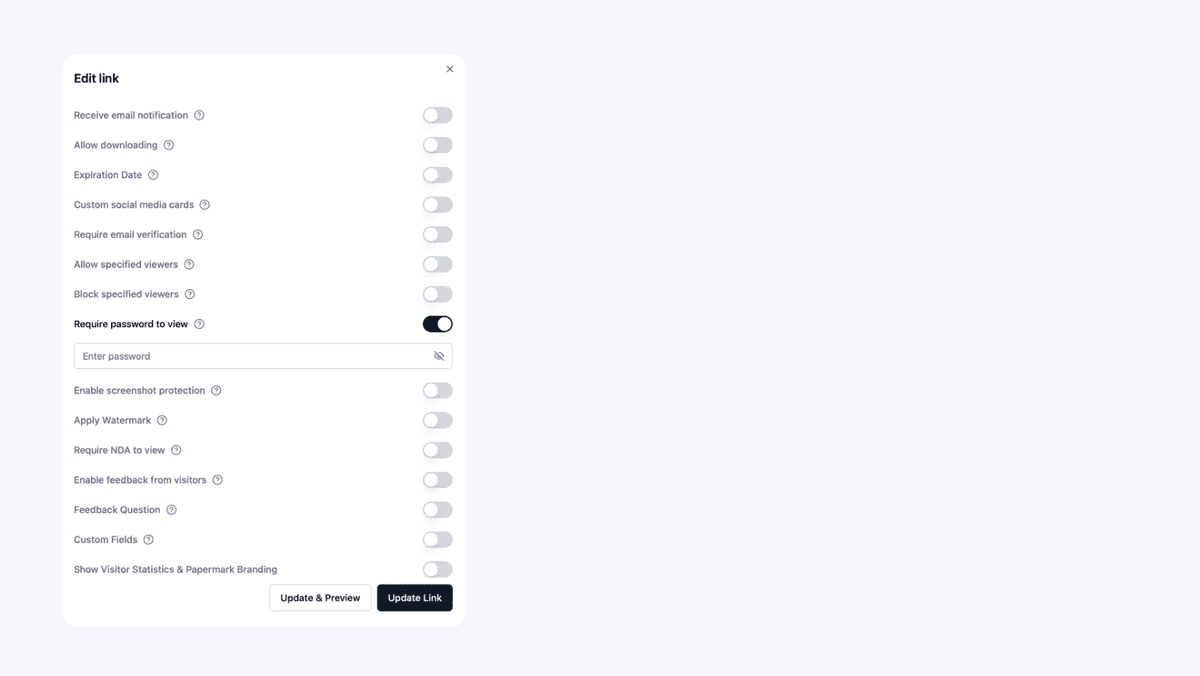
  • Must-have features: AES-256 encryption at rest, TLS 1.3 in transit, password gating, NDA enforcement, dynamic watermarking, link expiration, audit trail.
  • 8-step Papermark setup: upload, configure security, password, access controls, watermarking, NDA gating, share link, monitor activity.
  • Compliance: SOC 2 Type II, GDPR (with EU/Frankfurt hosting), HIPAA-ready BAA on enterprise plans.
  • Pricing: Free, Pro €24/month, Business €59/month, Data Rooms from €99/month. See pricing.
  • When to upgrade: for multi-bidder M&A, institutional fundraising, or regulated DD, move from file sharing to a virtual data room.
  • Papermark security page: papermark.com/security.

Step 1: Upload Your Documents

Before you can share your documents securely, you'll need to upload them to Papermark:

  1. Log into your Papermark account.
  2. Navigate to the "Upload" section to add individual documents or create a Data Room for organizing multiple files.
  3. Upload your documents that require secure sharing.

Step 2: Configure Security Settings

Once your documents are uploaded, it's time to configure the security settings:

  1. Access the document settings.
  2. Select the security options that suit your needs from the available features.

Security Settings

Step 3: Set Up Password Protection

Password protection adds an essential layer of security:

  1. Enable password protection in the document sharing settings.
  2. Create a strong, unique password that will be required for recipients to access the document.
  3. Share the password separately from the document link for added security.

Step 4: Configure Access Controls

Granular access controls let you define exactly how recipients can interact with your documents:

  1. Set viewing permissions to determine whether recipients can download, print, or only view the document.
  2. Set expiration dates for time-sensitive documents.
  3. Restrict access to specific email domains or individuals if needed.

Step 5: Enable Dynamic Watermarking

Watermarking helps deter unauthorized sharing:

  1. Enable dynamic watermarking in the document settings.
  2. Configure watermark settings such as opacity, text, and positioning.
  3. Enable viewer information to display the viewer's email address and timestamp on the document.

Watermarked Document

Step 6: Require NDA Signing (Optional)

For highly sensitive documents, you can require viewers to sign an NDA before accessing:

  1. Enable NDA requirement in the document sharing settings.
  2. Upload your NDA document or link to an online agreement.
  3. Recipients will need to accept the terms before gaining access to your document.

Step 7: Share Your Document Securely

Now that your security settings are configured, you can share your document:

  1. Generate a secure sharing link from the document dashboard.
  2. Send the link to your intended recipients through your preferred communication channel.
  3. Share the password separately if you've enabled password protection.

Step 8: Track Document Access and Activity

One of the most powerful aspects of secure file sharing is the ability to track document access:

  1. Access the analytics dashboard for your shared document.
  2. Monitor who has viewed the document and when.
  3. See which pages were viewed and for how long.
  4. Receive notifications about document access if enabled.

Benefits of Secure File Sharing

Implementing secure file sharing with Papermark provides numerous benefits:

  • Protection from unauthorized access through multiple security layers
  • Deterrence of unauthorized sharing through watermarking and tracking
  • Complete visibility into who accesses your documents and when
  • Compliance support for industries with strict data protection requirements
  • Control over document lifecycle with expiration dates and access revocation

Real-World Example: Secure Marketing Materials Sharing

See how Medusa JS, a leading open-source e-commerce platform, uses Papermark to securely share marketing materials and track engagement:

When secure file sharing graduates to a virtual data room

Secure file sharing covers one document or one folder going to one trusted recipient. The moment you share with multiple external parties under deal-grade pressure (M&A bidders, institutional investors, auditors, regulators), you need NDA enforcement before access, per-bidder scoped permissions, dynamic per-session watermarking, structured Q&A, and a legally defensible audit trail. That is what a virtual data room provides on top of secure file sharing's foundation.

For deeper reading, see best virtual data rooms in 2026, virtual data room features, and data security in 2026.

FAQ

Conclusion

Secure file sharing is essential for any business handling sensitive information. By following the 8-step setup and using Papermark's encryption, NDA gating, dynamic watermarking, and audit trail, you share documents with confidence and full visibility.

Share secure documents

No credit card required

Page by page analytics
Require email verification
Require password to view
Allow/Block specified viewers
Apply Watermark
Require NDA to view
Custom Welcome Message

More useful articles from Papermark

Ready to securely share documents?